• Skip to primary navigation
  • Skip to main content
  • Skip to primary sidebar
  • Home
  • Memorial Day
  • More Recipes
    • Breakfast
    • Easy Dinner Recipes
    • Appetizers/Snacks
    • Side Dishes
    • Best Dessert Recipes
    • Cookies
    • All Recipes
    • Categories
  • Travel
  • Shop

Easy Recipes for Family Time - Seeded At The Table logo

menu icon
go to homepage
search icon
Homepage link
  • About
  • Contact
  • Memorial Day
  • Cookies
  • Appetizers/Snacks
  • Easy Dinner Recipes
  • All Recipes
  • Travel
  • Shop
×

Home » DIY » DIY Pinboard World Map

February 26, 2014

DIY Pinboard World Map

This post may contain affiliate links. Read my disclosure policy.

Pin
Share
Tweet
Share
98Shares

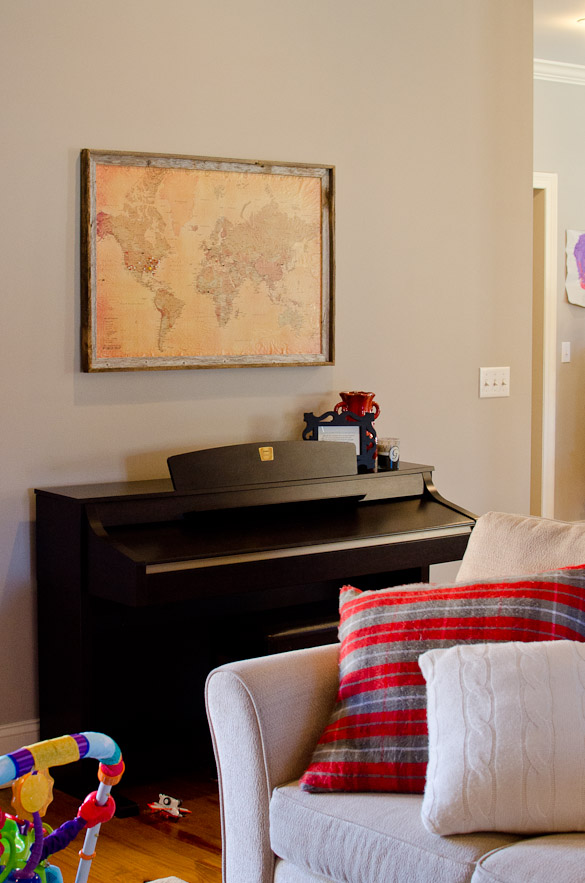
A DIY pinboard map to showcase the places you've been!

DIY Pinboard World Map - With just a few inexpensive items, you can make your own push pin map! SeededAtTheTable.com

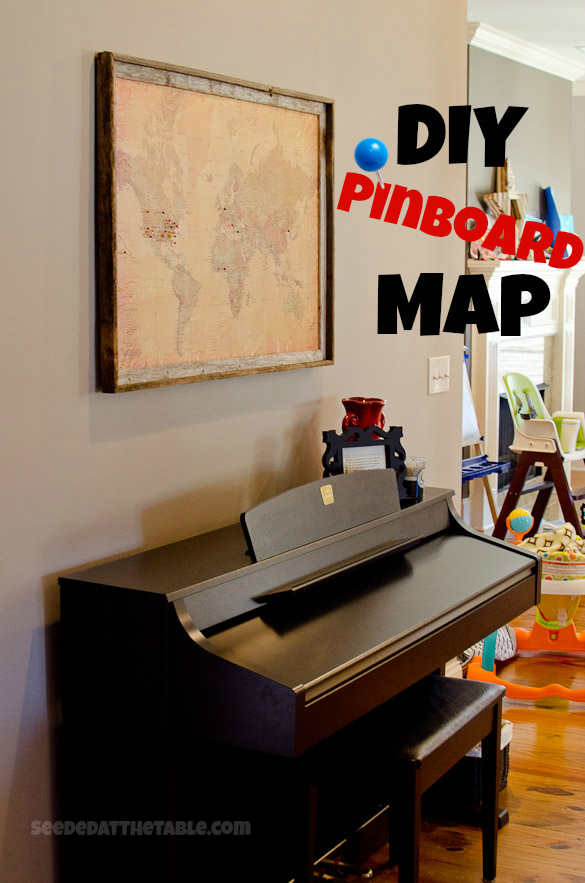
We recently decided to incorporate a travel theme to our home because traveling is a common love between the two of us.  I had been trying to think of a related decoration to hang over our piano and wanted a framed pinboard map of the places we've been.  After a quick Google search, I found that this type of framed map is just way too expensive to buy (starting in the $200 range)!

DIY Pinboard Map

So Ben and I set out to make our own.  We already had a large foam insulation board in the garage that he cut down to size and I found a cheap vintage looking world map poster on Amazon.  Ben came up with how to do it (after my failed attempt primarily using mod podge).  We used spray adhesive to the back of the poster, then quickly and carefully stuck it to the insulation board.  Then, using inspiration from this post, we made a trip to Hobby Lobby to purchase our frame.

Here's how we did it and how much it cost:
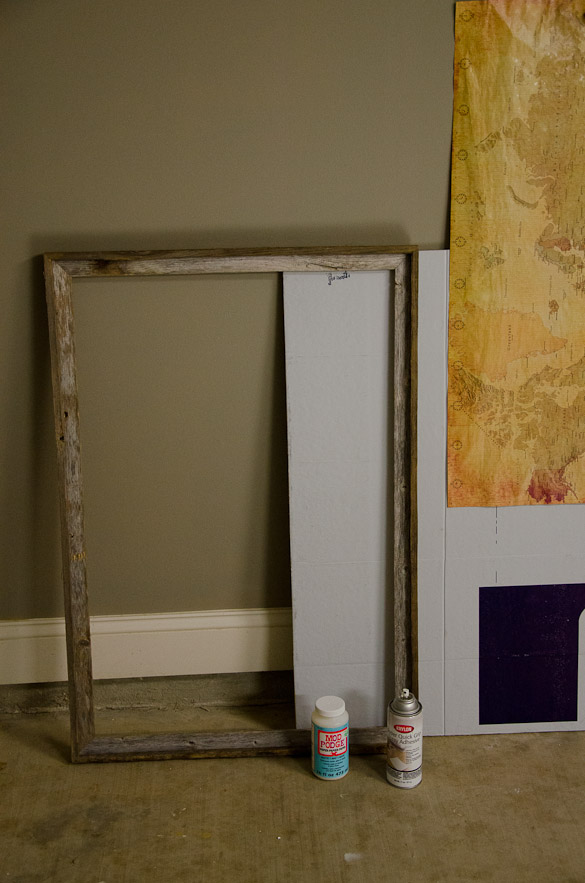
DIY Pinboard Map

Supplies:
24- x 36-inch World Map Poster (Amazon.com) - $5 including shipping
Foam Insulation Board (The Home Depot) - $10 for 4' x 8' sheet, but we already had this on hand
24- x 36-inch Frame (Hobby Lobby) - $20 on sale
Krylon 7777 Super Quick Grip Spray Adhesive (Michael's) - $6 with 40% off coupon
OPTIONAL: Mod Podge Matte Finish (Hobby Lobby) - $6 with 40% coupon
Map Pins (Office Max) - $3.00

Total Cost:
$50.00 (or less, if not using Mod Podge or you already have supplies on hand)

DIY Pinboard Map - less than $50
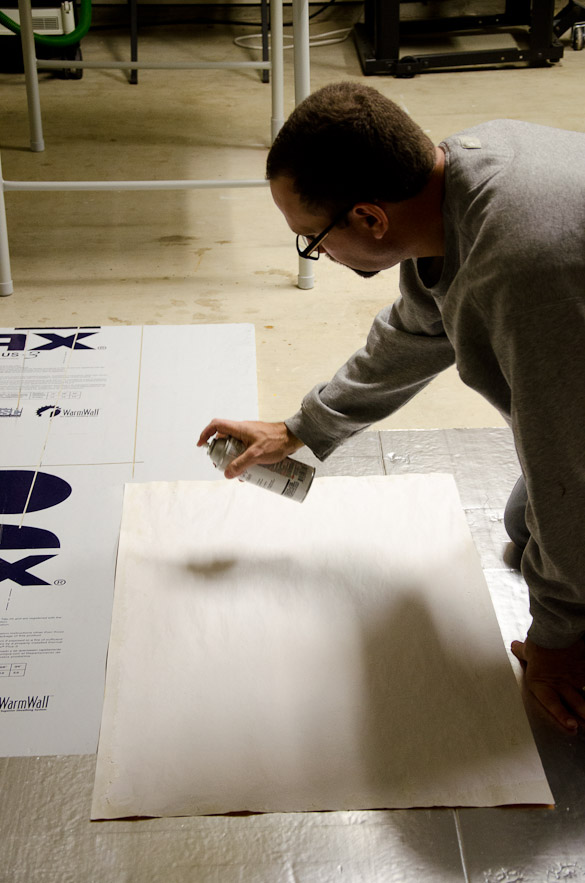
1) Spray the back side of the poster map and the front side of the insulation board with an even layer of the adhesive spray.

DIY World Map Pinboard
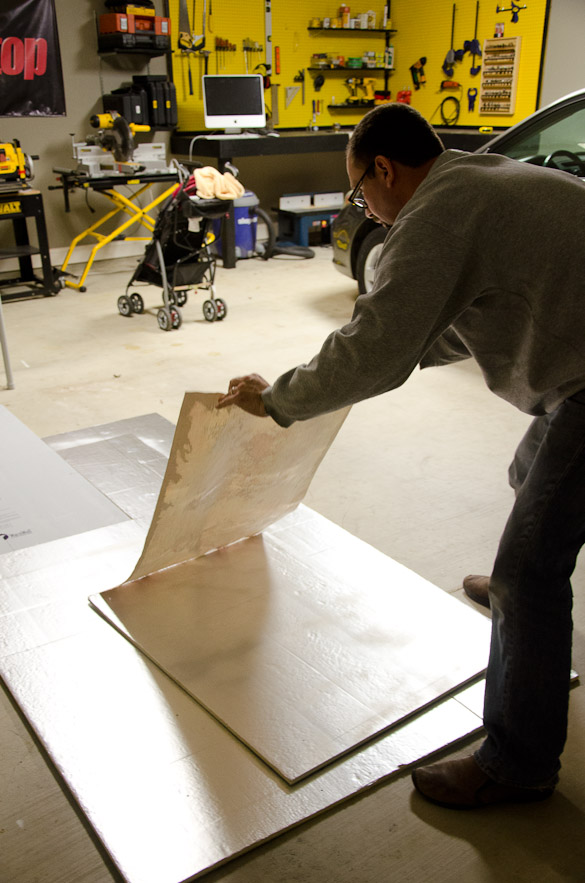
2) Working quickly, carefully place the poster over top the insulation board (the sticky side).  We didn't cut the insulation board to the exact size until after we stuck the poster map to it.  In other words, the insulation board was about 1 inch larger on each side in order to give us room for error, then Ben cut it to the size of the poster once it was glued on.

DIY Pinboard World Map
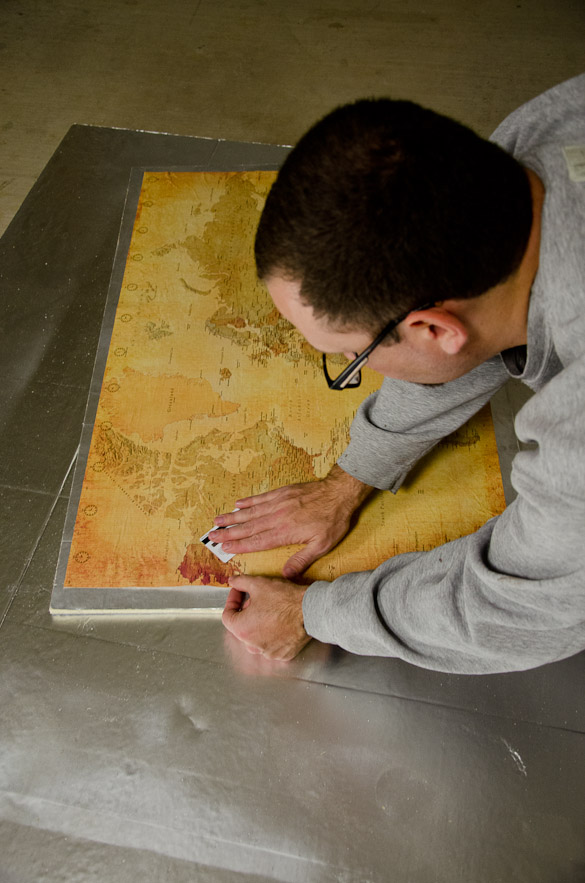
3) Use a credit card to smooth down the poster map onto the insulation board and get rid of bubbles.  Note: You will have to embrace some bubbling.  Unless you are a super amazing bubble blaster, it is impossible to not have bubbles.  If bubbles do not appear now, they probably will later...  Let dry for at least 1 hour.  After this step, I also added a thin layer of matte finish Mod Podge to take out the glossiness of the poster for a more vintage/worn look.  The Mod Podge is not required.

DIY Pinboard World Map
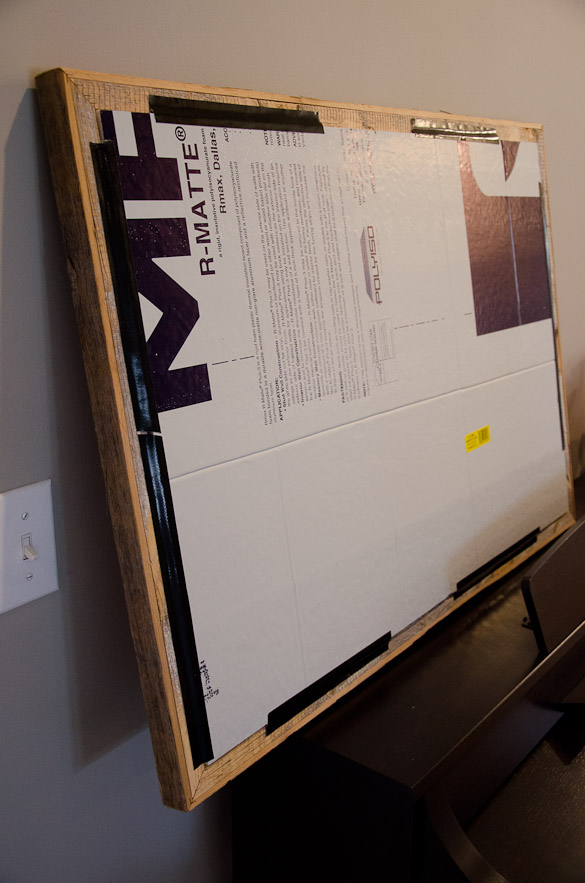
4) Tape the map to the back of the frame.

DIY Pinboard Map
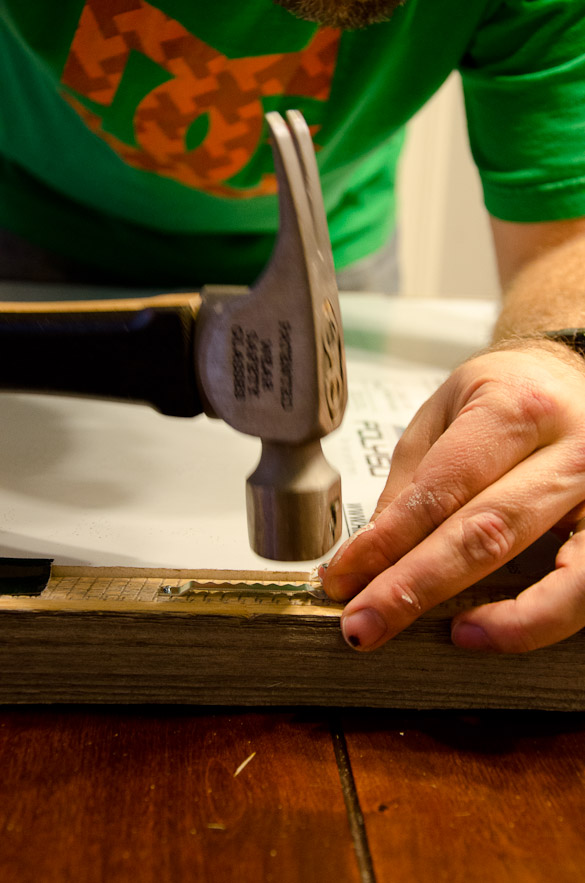
5) Nail in your hook.  (Look at my man's sexy work hands!  Rawrrr!)

DIY Pinboard World Map6) You're done! Hang that puppy up and start pinning!

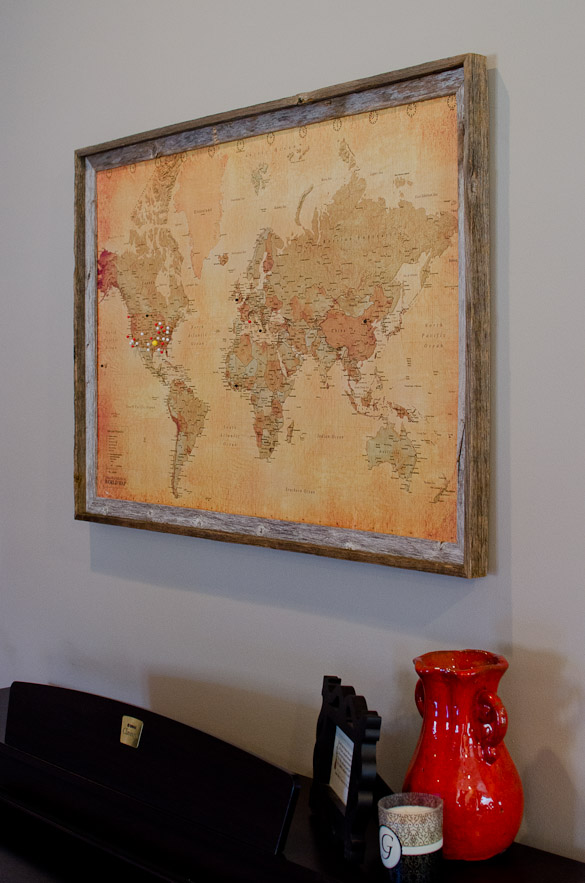
We use our map to pin the places we've been together as a couple (red), as a family (white), and then where we have friends and family ministering so we can remember to pray for them (black).  We want to use this map to teach our children to pray for those serving God around the world, while learning a bit of geography.

DIY Pinboard Map

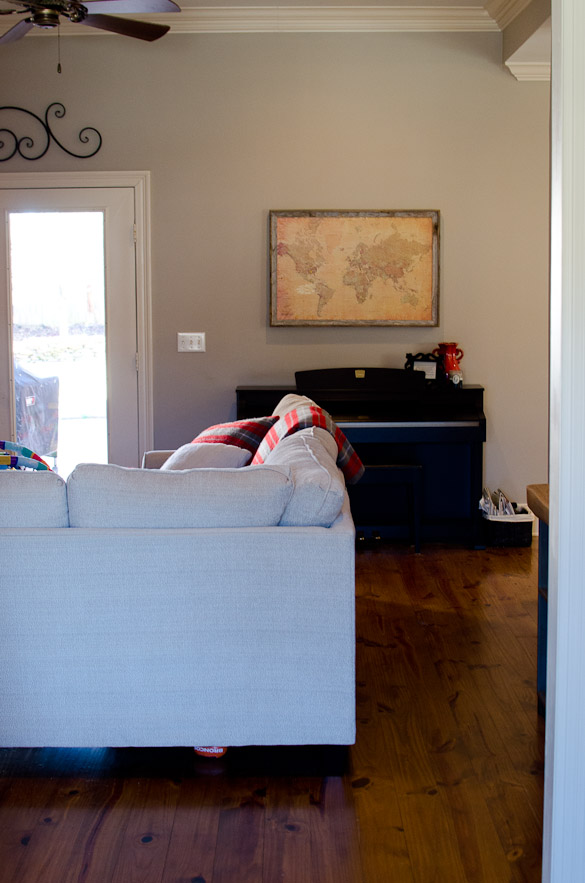
Plus, it adds nice a rustic decor to our living room, don't you think?

Pin
Share
Tweet
Share
98Shares
« Pinterest Party: Red Velvet Cake Pie
Broccoli and Mushroom White Lasagna »
Seed at the table family photo

About Seeded At The Table

Thanks for visiting! We’re the Gladd family! We love donuts, Disney, LEGO and Jesus. Not in that order, of course. 🙂 Ben shares DIY wood-working projects and Nikki shares delicious recipes. You’ll also find a sprinkling of travel adventures and other family fun ideas!

Learn more about me →

Reader Interactions

Comments

  1. Ashlyn says

    May 09, 2022 at 2:55 pm

    5 stars
    Wow. Posted in 2014?! This has been the most helpful DIY pinboard map I've come across! I couldn't justify spending $35+ for a corkboard just to resize and take the chances that it might not even be real cork (as many reviews have said it's just fake cork; cardboard paper and super hard to push a pin into which defeats the whole purpose)! Sooooo innovative to replace it with a foam board and it was so easy to cut and fit into a frame. I even got the original frame backing to fit as the foam board I bought was only 1/8" in depth. Made one for the work office but now I'm definitely making one for home! Thank you for sharing!!!

    Reply
    • Nikki Gladd says

      May 09, 2022 at 3:05 pm

      Hi Ashlyn! I'm so glad this old post helped you! I really appreciate your feedback and love that you made this!

      Reply
  2. Anonymous says

    February 23, 2018 at 8:57 pm

    DONT USE MOD PODGE ... WAY TO MANY WRINKLES !! ... HAVE TO START OVER NOW!! USE THE SPRAY LIKE THEY DID

    Reply
  3. Von says

    January 19, 2018 at 6:01 pm

    My project hasn't started out well, so I'm happy to find your tutorial. I purchased the map and a 24 x 36 framed cork board from Walmart, not realizing the size of the cork board included the frame. Even after removing the frame, the map was too big. BTW, I found the cork on that board was paper thin, attached to cardboard. Like that you used foam board. Will try that!

    Reply
  4. Lynne says

    August 19, 2017 at 11:42 pm

    This was very helpful. Be sure that you get foam board that is only 1/2 inch thick. I got 1 inch and it's way too thick. It causes a problem with how to hang the frame. Thank you for the post!

    Reply
    • Nikki Gladd says

      August 20, 2017 at 4:59 pm

      Thanks for the tip, Lynne!

      Reply
    • Von says

      January 19, 2018 at 5:26 pm

      Glad I read the comments. Thanks for the tip!

      Reply
  5. Parquet Indo says

    July 18, 2017 at 8:05 am

    so helpfull for thos who dont know

    Reply
  6. Jennifer says

    May 18, 2016 at 10:26 pm

    I'm soooo glad that I came across this post. I've been looking to buy one of these for my boyfriend, but I agree, they were too expensive. I had thought of making my own as I am very crafty was I was a bit intimidated by how much time it might take. Thank you for sharing!

    Reply
  7. Elyse says

    December 03, 2015 at 4:19 pm

    Since the foam board is quite thick, how did you cut it down? Do regular scissors work? Thanks!

    Reply
    • Nikki Gladd says

      December 06, 2015 at 6:55 pm

      I used an exacto knife.

      Reply
  8. Eve says

    September 20, 2015 at 6:47 pm

    Hi,

    I am trying to find out the difference between the foam board and the foam insulation board. Is there much difference in using either?

    Reply
  9. Lisa says

    August 15, 2015 at 2:53 pm

    Here's a tip that worked for me: spray the adhesive on the board, not the map, that way the map doesn't get so wrinkled. I got repositionable adhesive and was able to lift up a corner that got accidentally tucked under. Also smooth from the center outwards.

    Reply
    • Nikki Gladd says

      August 15, 2015 at 3:12 pm

      Thanks, Lisa!

      Reply
  10. Brad says

    June 12, 2015 at 10:32 am

    What is the name of the Hobby Lobby frame?

    Reply
  11. Brad says

    June 12, 2015 at 10:31 am

    Could you specify the name of the frame you used from Hobby Lobby? It looks really good but I am having trouble finding it. Thanks.

    Reply
    • Nikki Gladd says

      June 12, 2015 at 12:27 pm

      Hi Brad. I'm sorry, I don't know the exact name of it. It is one of their normal frames they carry in their custom framing aisle. I guess it's possible they do not carry it anymore, but I'd be surprised because it's a pretty popular one. Maybe they were out of stock the day you went in? Make sure you're looking in custom framing and not in normal picture frames aisle. Hope this helps!

      Reply
  12. Erin says

    March 26, 2015 at 1:24 pm

    I LOVE THIS!!! I am going to make my husband one for our 1st anniversary and am so excited! The frame is phenomenal! I really hope Hobby Lobby still has it! EEEK! Wish me luck!!

    Reply
  13. Suheyla says

    December 09, 2014 at 3:04 am

    Great idea!! Thank you for sharing this. I'm hoping to attempt to recreate it as a gift. Do you know how thick the foam board you used was?

    Thanks again!! xxx

    Reply
    • Nikki Gladd says

      December 09, 2014 at 12:16 pm

      Hi Suheyla,
      I think it was about 1/2 inch thick? Maybe less?

      Reply
  14. Sue Gladd says

    October 28, 2014 at 8:21 pm

    I love your map. Have you heard of "Flat Stanley"? The first grade at our school uses a huge map in the hall to keep track of him. It's funny how maps are nothing until you use them to teach your kids where you are and where you've been.

    Reply
  15. Hannah says

    August 17, 2014 at 9:14 pm

    AWESOME! Thanks for the amazon link, it's the cheapest place I've found a cool map like that! Planning to give this as a graduation gift to travel-lovers and gonna make one for our living room too!

    Reply
    • Nikki Gladd says

      August 18, 2014 at 7:16 am

      Great idea to gift it, Hannah! 🙂

      Reply
  16. Lizzie says

    August 05, 2014 at 10:46 am

    Brilliant! Love the commentary too :)! Thanks for sharing!

    Reply
  17. Sue Gladd says

    March 02, 2014 at 8:13 pm

    Fabulous idea!!!

    Reply
  18. Karen says

    February 26, 2014 at 11:41 am

    Um, I LOVE THIS!!!! Maybe I can convince Addison to do this when he's not busy with seminary (May 2015??!!)

    Reply
  19. Becky says

    February 26, 2014 at 8:35 am

    I love it! I especially like trimming the foam board down to size AFTER the map is glued on...I wouldn't have thought of that and would have probably ended up very frustrated 🙂

    Reply
  20. Jen @ BeantownBaker.com says

    February 26, 2014 at 7:53 am

    We made a "newlywed map" after we got married for the same reasons. We put pins in any place we've been since we started dating. It's been fun to add new pins as the years go by.

    Reply
  21. Angie Landon says

    February 26, 2014 at 6:28 am

    Very cool

    Reply

Leave a Reply Cancel reply

Your email address will not be published. Required fields are marked *

Recipe Rating


This site uses Akismet to reduce spam. Learn how your comment data is processed.

Primary Sidebar

Search for Recipes

© 2022 · Seeded at the Table · Home · About · Contact · Privacy Policy