

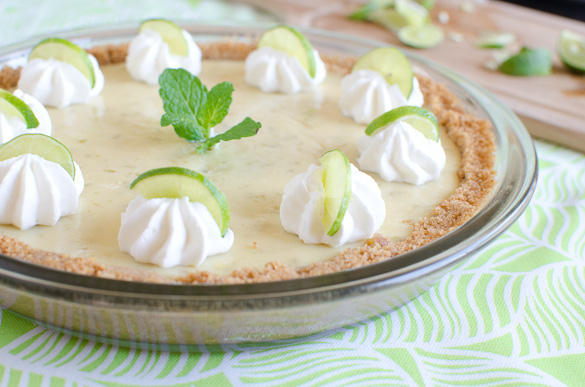
Use regular limes or key limes to make this surprisingly very easy pie! Enjoy all spring and summer!
 Can you find key limes in your grocery store? One of the things I've noticed (and liked) about living in the South is having access to certain produce that I couldn't easily find in the Midwest. Key limes being one of them! However, the crazy thing about Key Lime Pie is you do not have to use key limes. You can use regular (Persian) limes that are available to you at any grocery store or market year round. Pretty cool, huh?
In fact, a lot of people prefer to make Key Lime Pie using the larger regular limes because it requires squeezing less of them to get the amount of fresh juice you need. If using regular limes, you only need about four of them verses about a dozen key limes. I tried both versions, and because Ben and I really couldn't tell much of a difference, I think I prefer to use regular limes, too.
Either way, we love this recipe for Key Lime Pie!
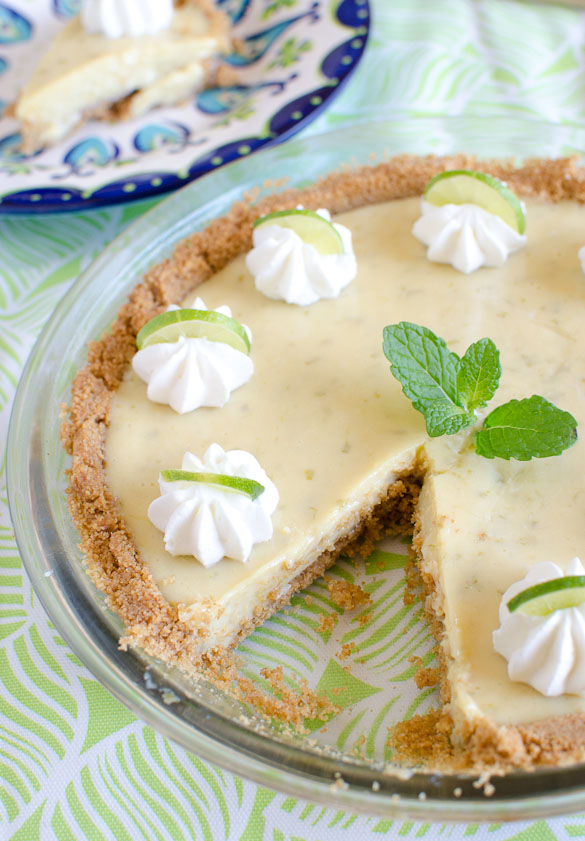 Whatever you do, do not try to make your pie green. Key limes, when at their ripest, are actually more yellow in color. If you add green food coloring to your pie, you might get a bit teased. I warned you! 😉
Recipe Card

Key Lime Pie
Ingredients
For the Crust:
- 9 graham crackers
- 2 Tablespoons granulated sugar
- 5 Tablespoons unsalted butter , melted
For the Filling:
- 4 teaspoons lime zest
- ½ cup strained lime juice (from about 4 regular limes or 10-12 key limes)
- 4 large egg yolks
- 1 (14 oz) can sweetened condensed milk
For the Topping:
- ½ cup cold heavy whipping cream
- 4 Tablespoons powdered sugar
- 1 teaspoon pure vanilla extract
Instructions
For the Crust:
- Lightly grease a 9-inch glass pie plate with nonstick spray. Preheat oven to 325 degrees F.
- Using a food processor or blender, crush the graham crackers into fine pieces. You should have 1 cup of crumbs (add more if needed). Mix in the sugar and process quickly to combine. Slowly pour in the melted butter while continuing to process until the mixture resembles wet sand. Do not over mix.
- Press the crumbs into the bottom and up the sides of the pie plate. Use the bottom of a ½ cup measuring cup to help create the edges up the side. Bake on the center rack of the oven for 15 minutes. Remove from the oven and let cool completely on a wire rack. Make the filling.
For the filling:
- In a medium bowl, briskly whisk together the lime zest and egg yolks for 2 minutes. Beat in the condensed milk, then add the juice and continue to whisk together until smooth. Set aside to thicken at room temperature for 30 minutes. Leave the oven on at 325 degrees F.
- Pour the lime filling into the cooled graham cracker crust. Bake at 325 degrees F for 15 to 17 minutes, or until the filling is set yet still a little wiggly. Remove from the oven and let cool to room temperature on a wire rack. Lightly grease plastic wrap with nonstick spray and cover pie. Refrigerate for at least 3 hours.
For the Topping:
- Once the pie is chilled, and up to 2 hours before serving, make the whipped topping. Using an electric mixer, whip the whipping cream for a few minutes until soft peaks form. Add the vanilla and whip for 10 more seconds. Whip in the powdered sugar and continue to whip until just-stiff peaks form. Spread the whipping cream over the top of the pie, or decorate with piping bags.
- For best taste, consume within 24 hours. Store in fridge.

