

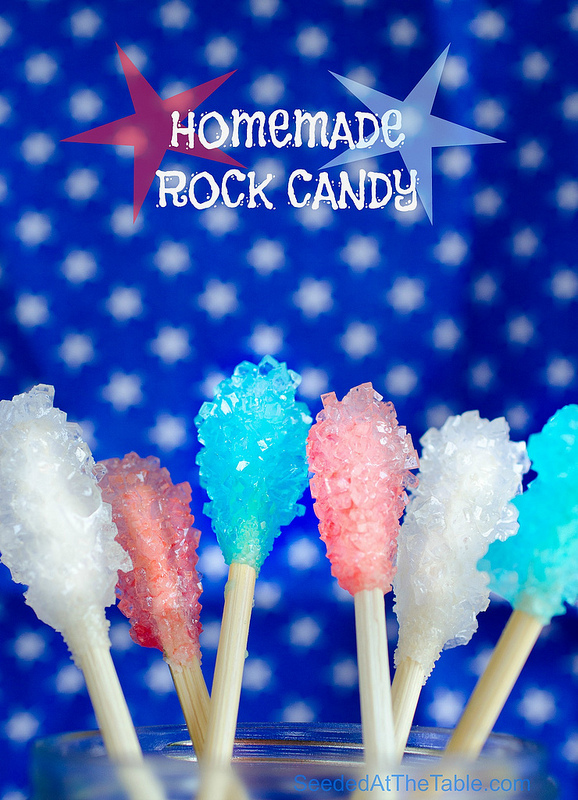
Rock candy... Does that spark some favorable memories for you? If you follow me at all on Instagram, you are probably tired of seeing my posts about rock candy. Judah and I have been making different colors for the past several weeks. Yes, weeks. Although the method is easy, the waiting time is one week before the sugar is crystallized to the bamboo sticks. Because I wanted to make the three colors of red, white, and blue for the holiday, and because I only have one pan I can dedicate to an entire week of just sitting there making rock candy, it took us at least three weeks.
This is one science experiment you will not fail. It's the simplest thing ever, which is why it is also such a great activity in the kitchen for your kids! Parents - you take charge of boiling up the sugar water, and then let your kids dip and roll the bamboo rods in syrup then sugar. Work together to stick the rods into a piece of foam and turn upside down into the syrup that is cooled in the pan. The rods will hang out on the counter for your kiddos to glance at multiple times a day while asking "Is the rock candy ready yet!?"
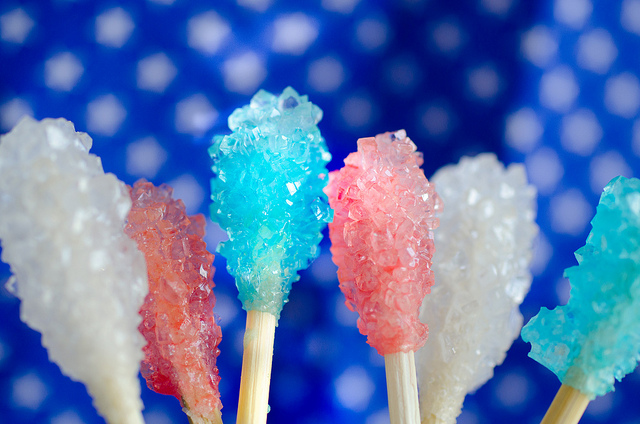
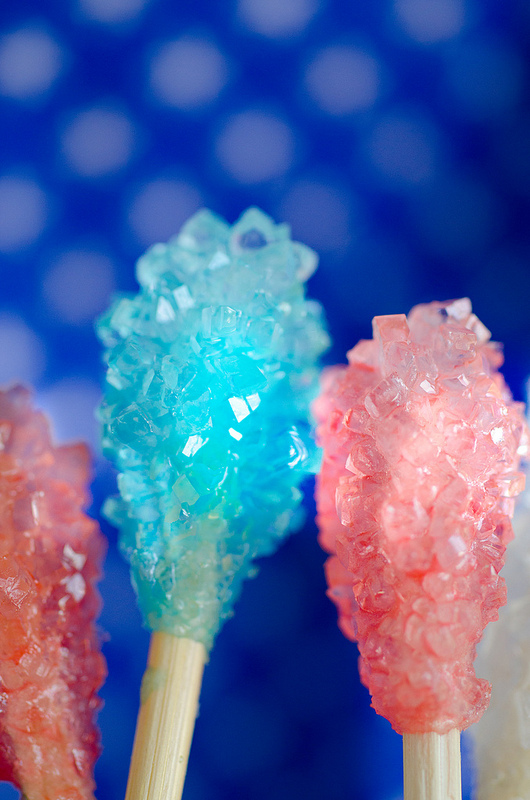
On day SEVEN, you can say "Yes! It's ready!"

You're kids will jump for joy and want to eat all of them at once. (At least, that's what my kid suggested.) 🙂 But, savor them, share them, show them off. Because these candies are super cool and super impressive... yet super simple.
I found this recipe that was created by Chef Eddy over at Imperial Sugar. I actually met Chef Eddy a couple of weeks after making our first batch while we were both in Austin for the BlogHer food conference! Pretty cool!
Recipe Card

Homemade Rock Candy
Ingredients
- 6 cups extra fine granulated sugar (*see note below)
- 2 cups water
- Food coloring , if desired
- 12 to 15 bamboo skewers , cut down to preferred length
- ¼ cup granulated sugar , or more as needed
- 1 Foam block (example linked)
Instructions
- In a large pan over medium high heat, stir the water and 6 cups extra fine sugar until the sugar is dissolved. Add food coloring, if desired, then bring to a full boil while stirring frequently. Turn off the heat and ladle ½ cup of the syrup into a large coffee mug. Set aside and let it cool. Leave the rest of the syrup in the pan, removed from the heat, and allow to cool covered with plastic wrap overnight.
- Meanwhile, spread the ¼ cup granulated sugar onto a small plate. Dip one edge of each skewer into the cooled ½ cup reserved syrup, then roll the dipped side of the skewer in the granulated sugar. Place on a baking sheet lined with plastic wrap. Repeat for all skewers and add more sugar as needed. Allow the dipped skewers to dry also overnight.
- The next day, stick the un-dipped side of the skewers into a foam block, about 1-inch spaced from each other. Place upside down into the pan with the sugar syrup so that the sugar-coated edges are now dipped into the syrup. Be careful to not place any sticks too close to the bottom or edge of the pan. Allow to rest for 7 days for the crystals to form and grow. Do not move the pan.
- On the 7th day, remove the skewers from the pan. You may need to gently wiggle the sticks to release them from the partially hardened syrup. Some skewers might not turn out as well as others, especially if they were too close to each other or too close to the bottom or edge of the pan.
- Transfer to wax paper, plastic wrap or parchment paper to dry for one day. (Turn them every few hours so each side can completely dry.) Wrap the dried rock candy in plastic wrap. Use the leftover syrup to make another batch! (Just repeat the process above starting with dipping and rolling the skewers in the syrup then sugar.)

Sue Gladd says
I've always been fascinated with rock candy's beautiful crystals...so great for July 4!!!!
Ashley says
Im a little confused, the list of ingredients calls for 6 cups of sugar, but the directions only says 2 cups. So what about the other 4 cups of sugar? Is it supposed to be 2 or 6 cups?
Nikki says
Ah, sorry! It's 6. I fixed the typo. Thanks, Ashley!
Nutmeg nanny says
This is too cute and so much fun 🙂
Suzanne says
I remember watching a reel to reel movie in elementary school that showed this. I've always wanted to make rock candy at hi,e ever since then. This would be such a fun project to do with my son!
Katrina @ In Katrina's Kitchen says
My son loves rock candy and we've only ever made it at home once...because I can't handle the anticipation!! 😀
Kristen says
You very well might be my 9 year old daughters new BFF - she loves rock candy!
Rachel @ Baked by Rachel says
I'm seriously in love with this. I absolutely need to find the time to make these.
steph@stephsbitebybite says
Whoa!! This is awesome!
Cathy Pollak ~ Noble Pig says
Yes this has such great memories for me! Even my older boys will love doing this! Never thought about making it at home!!
Anna @ Crunchy Creamy Sweet says
This is so fun! What a great project to do with my kiddos!
Meagan @ A Zesty Bite says
Oh my gosh these totally remind me of my childhood. We would go all the time to Fredericksburg, TX and their would be a shop that would sell these and I would have to have at least two.
Nikki says
haha! Great memories!
Kim says
Can you flavor the sugar syrup?
Nikki says
Hi Kim,
I didn't think of that, but I bet you can! Maybe drop in some extract? Not sure it would affect the crystals forming or not!
Anonymous says
Yes just add the flavor with the 1 cup of water at the beginning
Jamie @lifelovelemons says
what a great idea! who doesnt love rock candy?!
Heather says
So pretty! I can't wait til my little guy is old enough to do this!
Kiran @ KiranTarun.com says
This looks like a delicious science experiment!! So pretty!!
Carla @ Carlas Confections says
I was actually looking at rock candy recently and wondering how to make it at home. That is pretty crazy the way it is made! I imagine kids definitely go crazy over this one! And so fun for the 4th! 😀