

 My sweet boy turned ONE last month. To celebrate, I threw a party for
 us him the week after his birthday. It took me a while to decide on a theme. Did I want to try to plan around Judah's interests? But, what is a baby interested in at 12 months old that's fit for a party theme?? I went from Blue's Clues to sports to planes, trains and automobiles. Nothing really excited me until I saw this idea on Hostess with the Mostess. "One Year Old in a Flash!"...playing on the word "flash," as in a camera's flash.
Ben and I are obsessed with taking pictures of Judah. If you were my personal Facebook friend, you would be super annoyed at the thousands of photos I have posted! 🙂 Needless to say, a theme centered around photography and capturing memories on film really fit the bill. Although I found the theme online, I added my own little twist and really made it my own...
The Invitations

First, I sent out these invitations. This was probably the hardest part of the planning process for me. I wanted the invitations to be perfect and appropriately set the tone for the theme of the party. The problem? I'm not crafty, nor do I have the means (tools) to be crafty! After days of headaches and crossing my eyes, I finally figured out the way that I could do it without needing a cutting board, special markers, or an artistic hand. I got on Microsoft Word! Just by creating a few basic shapes and using WordArt, I was able to put together the main body of the invitation, printed multiple copies out at Staples, then glued them to yellow card stock I found at Michael's. The card stock also came with envelopes.
The three miniature Polaroid pictures glued on the invitations were a manipulation I did on my computer using screen shots and Picnik. It's too hard to explain and really actually embarrassing because I know there is an easier, more sophisticated way to do it. But, I did it my way (well, the only way I knew how), and I did it cheap. Walgreens came to my rescue with a special coupon code for 4x6 prints. I was able to print three "Polaroids" on a 4x6, and then cut each out individually before gluing to the card stock. Have I confused you? 😉
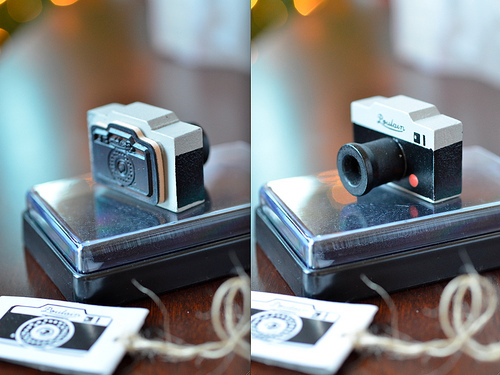 The camera image on the invitation is this stamp I bought from this really fun photography website called Photojojo. You must check out this store if you are into wild and unique photography products. I haven't even told my husband about this website yet because I plan to surprise him someday with a gift! Isn't the stamp adorable??
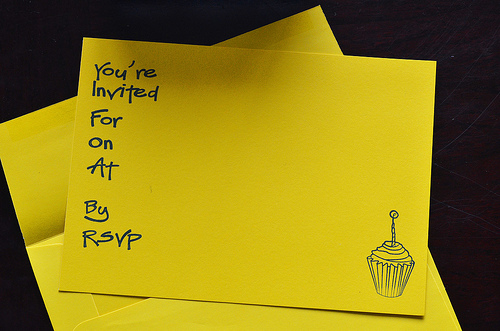
This is the back of the invitation that I made with two different stamps. I filled each one out individually with the party information. My first mistake? Assigning an RSVP date for the Saturday after Thanksgiving. Not one person RSVP'd on time, but I blame myself for choosing such a busy date. We had almost 40 guests that ended up RSVP'ing later, much to my delight.
The Decorations
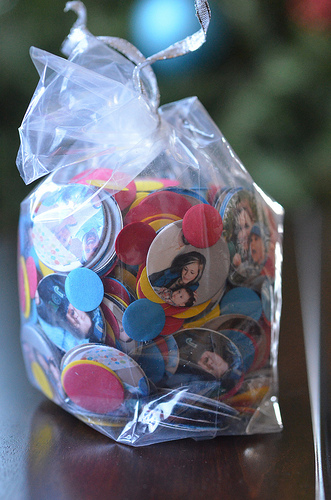 The decorations for the party were centered around the colors blue, red, yellow and green. I think the piece that was talked about most at the party was this festive confetti I ordered from Photofetti. This company takes your pictures and turns them into 1" double sided circle confetti, accented with smaller pieces with the colors of your choice!
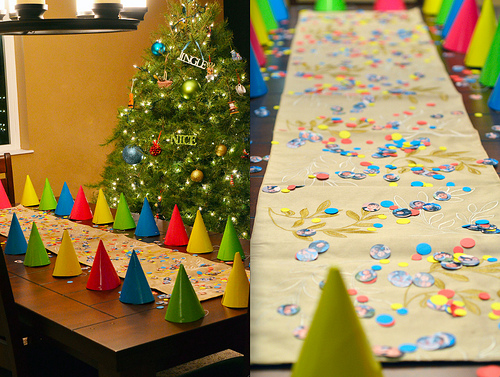 The Photofetti was perfect for scattering across the party table, lined with party hats.
 I also used the confetti to outline the homemade cupcake tower (more on this later).
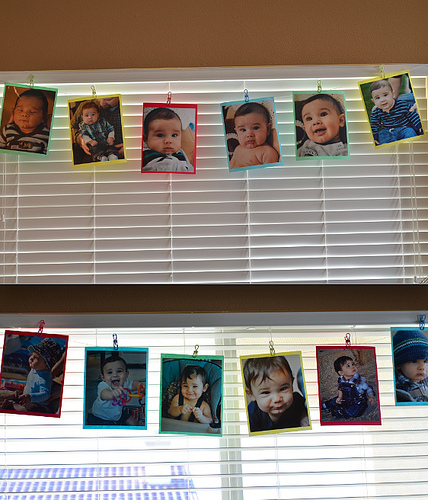 My favorite decoration was this banner of Judah's monthly photos. Turns out that Costco prints cheap 8x10's, so I picked out my favorites over the 12 months and glued them on 8 ½ x 11-inch card stock and hung them on twine with clothespins.
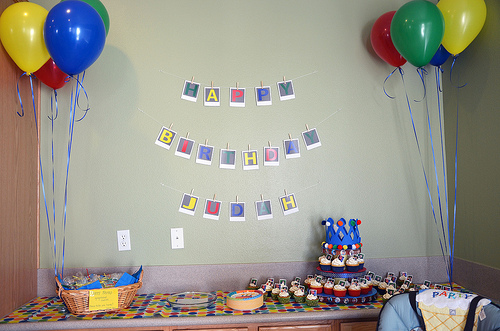
Lastly, for decorations, I created a "Happy Birthday, Judah!" banner on Microsoft Word (printed on card stock at Staples). The letters are shaped into Polaroid pictures. The dessert table was lined with tissue paper I found at Target.
The Activities
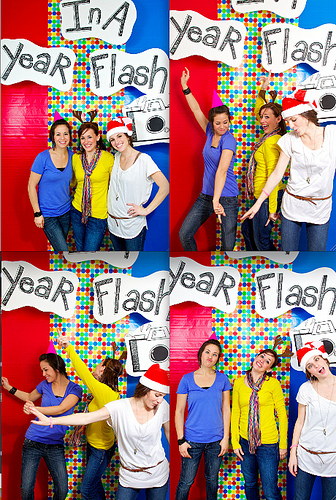
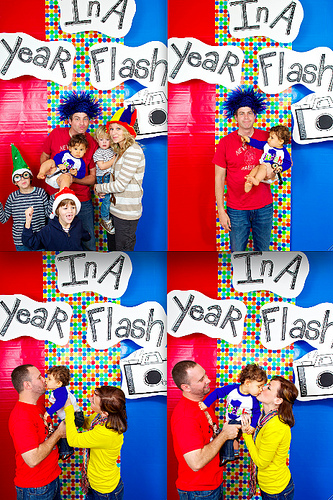
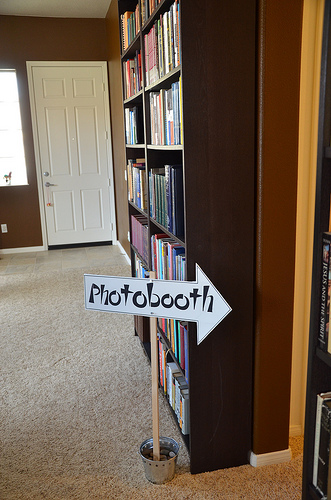 The only formal activity I planned for this party was a photobooth. It was also a nice party favor for our guests as I'll be posting these on a site where they can download the full resolution photo for free.
 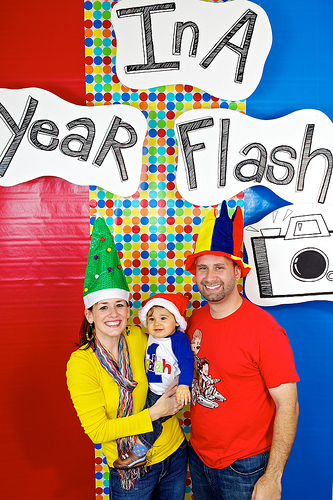 I was lucky to have two friends from church set up the photobooth and take the pictures with their equipment. They did a fantastic job! Here are a few of my favorites:
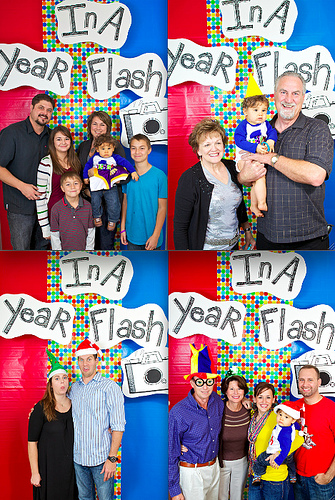
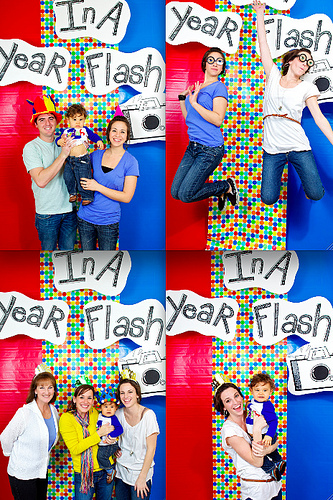

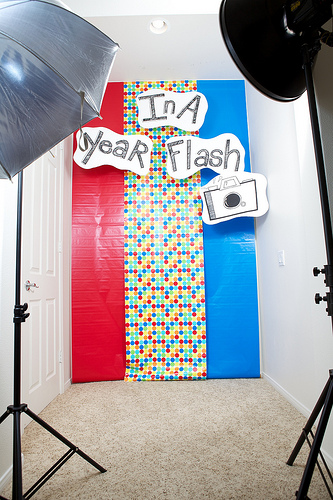
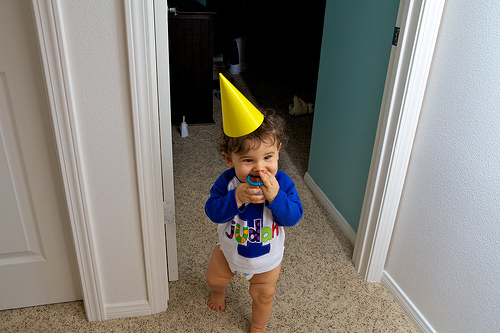
Wondering what the set up looked like? We found a spot in our hallway, right in front of our bedroom doors to create this space:
The Food
And now for the menu. That's why you're here, right? I mean, this is a food blog and all. 🙂 Since I couldn't think of any camera themed food suit for a child's party, I just went ahead with an easy kid friendly meal. I'll post photos and recipes in the coming days. On the menu:
Pulled Pork Sandwiches
Homemade Mac 'n Cheese
Hummus with veggies and pita chips
Pumpkin Spice Cupcakes
Vanilla Cupcakes
Trix Cereal Bark
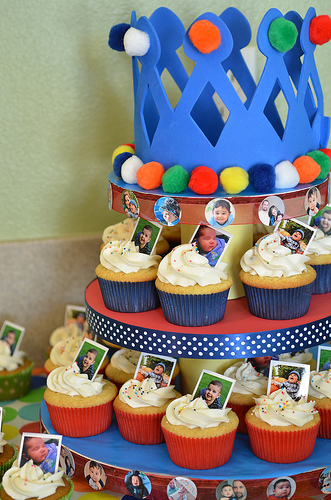 I served the cupcakes on a homemade cupcake tower, with Judah's crown towering the top. For a thorough tutorial on how to make your own cupcake tower, visit Annie's Eats.
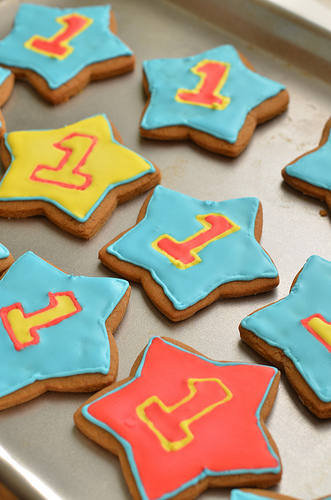 In addition to the menu, I handed out gingerbread cookies for party favors. Initially I was going to decorate regular sugar cookies, but since it was so close to Christmas, I thought gingerbread was appropriate. And, I found a new favorite gingerbread cookie recipe that I can't wait to share with you!
The Presents

Judah was able to get a lot of practice for Christmas by opening up his birthday presents. Although I stated "Please, no gifts" on the invitations, most of the guests brought him something. It was fun to see him tear them open and care more about playing with the wrapping paper than what was inside!
The Smash Cake
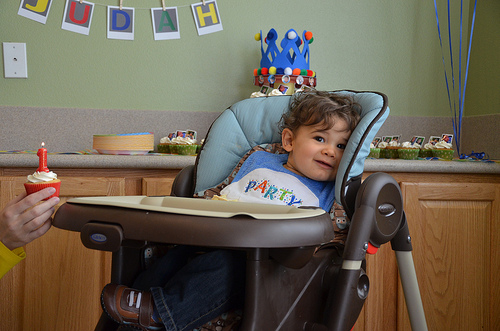
Judah became shy once everyone gathered around to see him smash his cupcake.
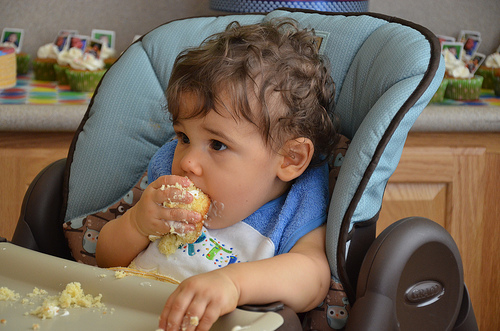
But, it didn't take him long to dig right in!
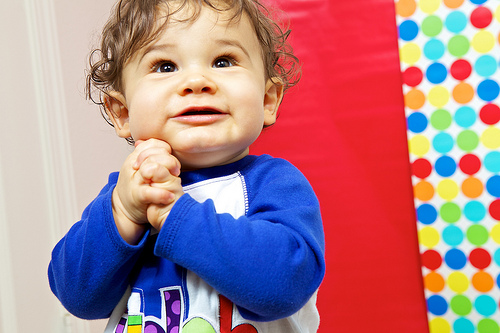
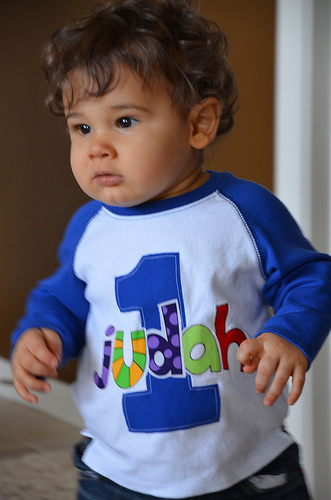 I know you are wondering. Judah's adorable shirt is from Little One Boutique. I'm so pleased with how quickly we received the shirt and the quality of it. He received many compliments on it that day!
 This party was super fun and I think Judah had a blast as well. I already can't wait to plan his second birthday! Should I be ashamed to tell you that I think I already have a theme picked out for next year? 🙂
Vendor Information and Credits
Theme Inspiration - Elle Belle Blog as seen on Hostess with the Mostess
Camera Stamp - Photojojo
Picture Confetti - Photofetti
Photobooth - Equipment from Makeshift Makers Photography, Photographs from Sarah Ashley Photography
Judah's Shirt - Little One Boutique

