

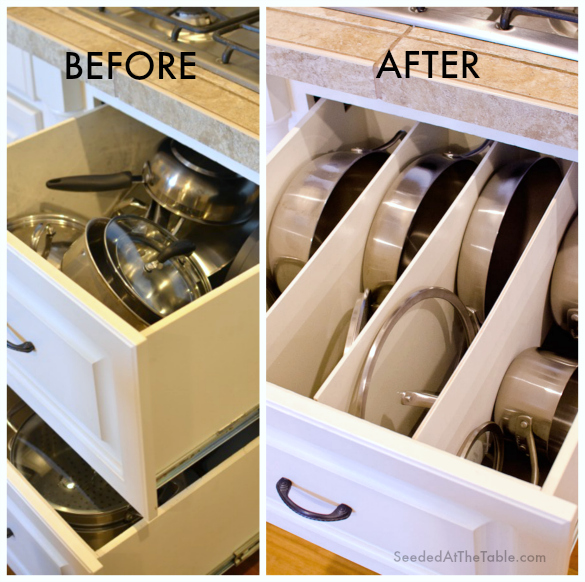
Try this DIY trick to keep your pots and pans neatly organized in your kitchen drawers. The easier it is to access your cookware, the easier it is for you to cook!
 Happy Spring, y'all!! I know at least half of this country was anxiously awaiting the arrival of the first day of spring, and now we are still anxiously awaiting actual spring-type weather! Even here in Mississippi, we are under a freeze warning today. Really!? My family in Michigan woke up to a fresh dusting of snow, and another friend who is visiting a southern Florida beach dealt with nonstop cold rain for her last two days.
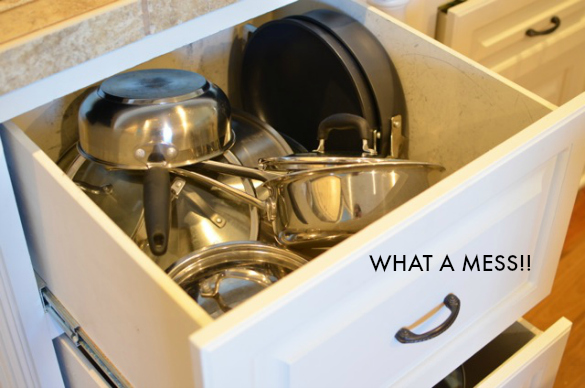 This crazy weather can make it difficult for us to get into "spring cleaning" mode, so let's focus on what can we do that doesn't require us to go outside! Ever since we moved into our new home a little over a year ago, I've been wanting to find a way to organize my pots and pans. My kitchen has two deep drawers underneath the stove that is perfect for storage of cookware, but every time I needed to grab a pan, I found myself digging through a mess of pots and their lids! I had to remove most of them just to get what I needed!
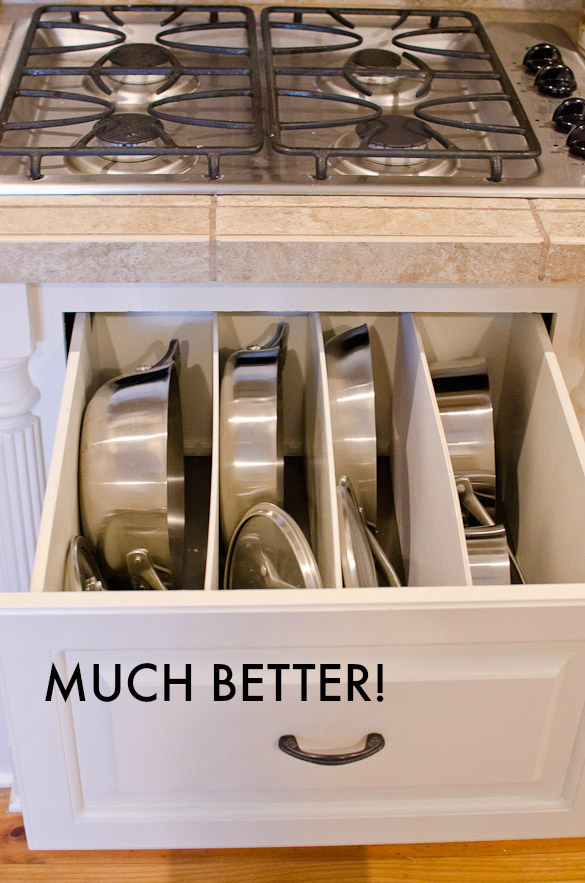 I knew Ben and I could put our heads together and figure out a way to organize my collection. We painted the drawers to cover the scratches and marks for a fresh look, then Ben built customized dividers that I can easily move around if I need a wider or more narrow space. He found a tutorial on The Family Handyman using dentil molding glued inside the drawers, then slip in panels made with ¼-inch plywood. Here is the step-by-step of how we did it, written by my hot and sexy handy-man husband, Ben!
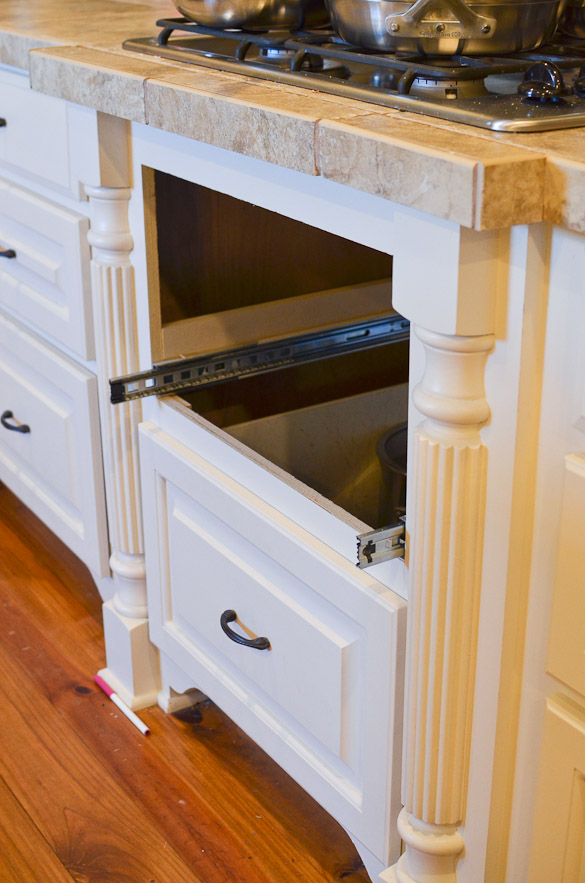
STEP 1: Remove the drawer.
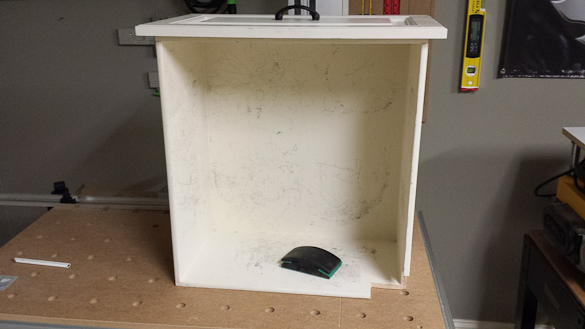 STEP 2: Prepare the drawer for painting by sanding with 120 or 180 grit sandpaper.
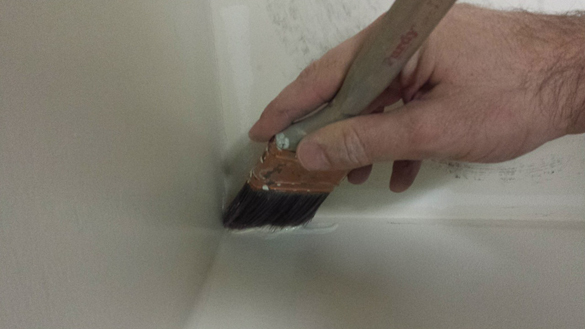 STEP 3: Prime (if needed) and paint the desired areas. For priming, I highly recommend Kilz primer (oil based). To avoid chipping, use contact paper or something similar instead of paint.
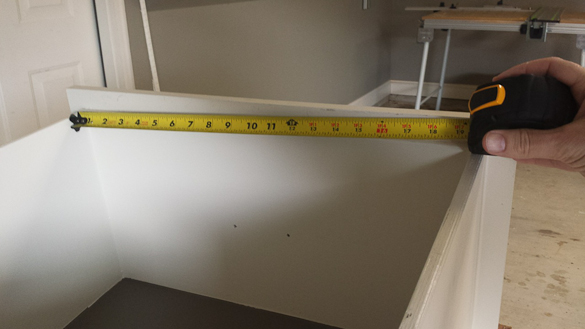 STEP 4: Measure the side of the drawer for the molding.
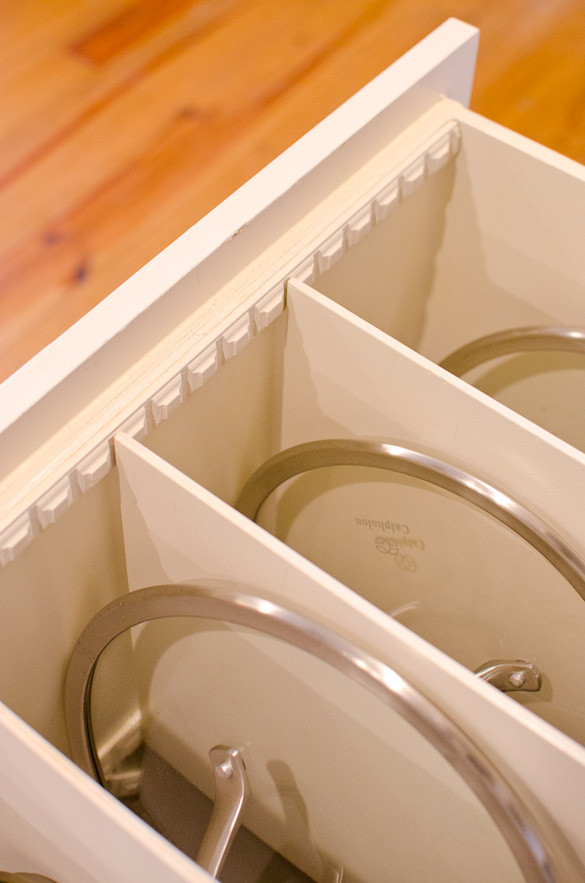
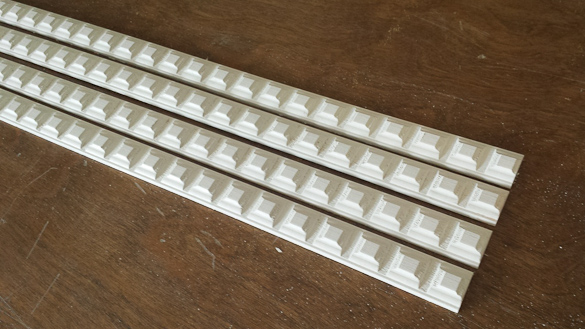 STEP 5: Cut four strips of molding that will fit the top and bottom of the drawer. Keep in mind that the drawer may not be square, so you may need to cut the strips accordingly. The trick here is to have all of the molding strips line up perfectly with one another. Notice that the lines run parallel to one another. This will ensure that the dividers will be straight.
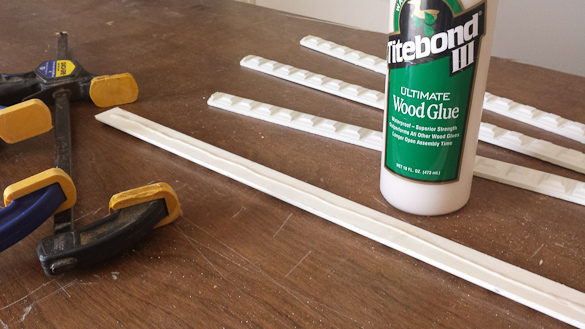 STEP 6: Glue the strips using Titebond II or III.
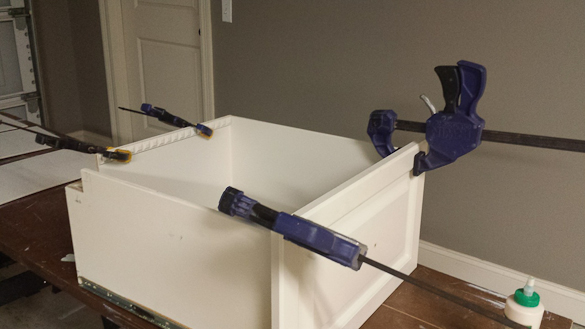 STEP 7: Using clamps for the top molding and a wedge for the bottom (not pictured: piece of wood or spacer), hold them tight and in place while drying.
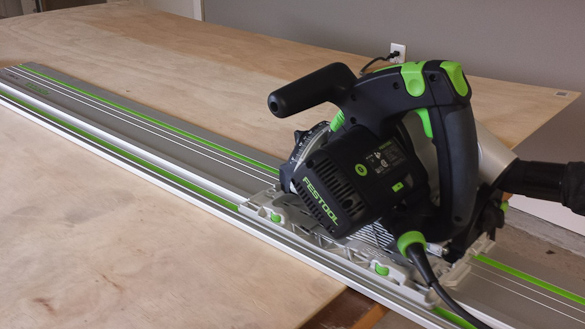 STEP 8: Measure the appropriate height and width for the panels (taking into account the width of the two molding strips) and cut the ¼ inch panel. (Or, go back to Home Depot and have them cut it for you.)
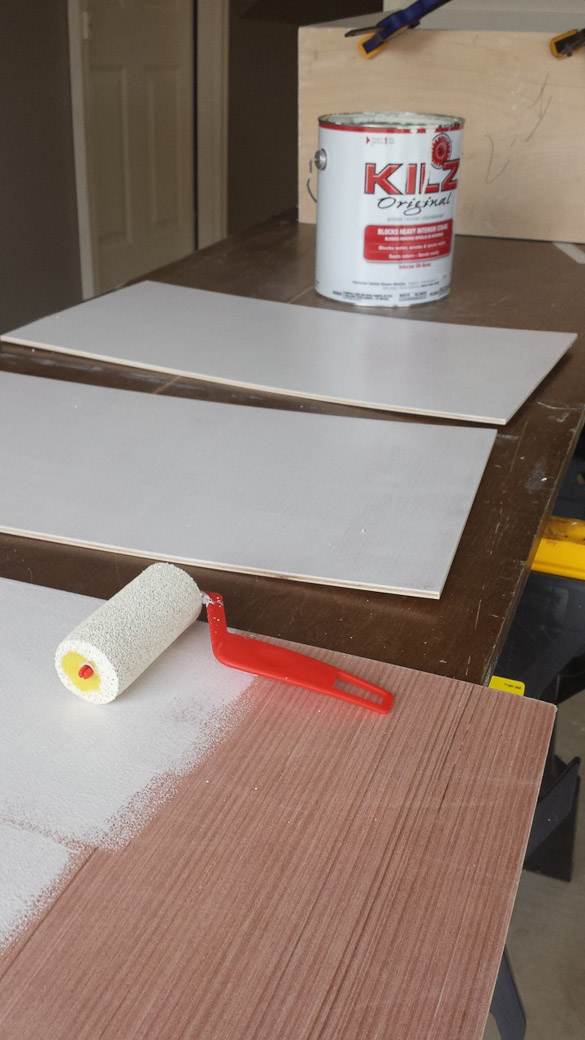 STEP 9: Prime and paint the panels your desired color. To curb paint chipping, you will need to apply a few coats polyurethane.
 STEP 10: Slide the panels in between the molding strips. Use your collection of pots and pans to determine the width you need between each panel.
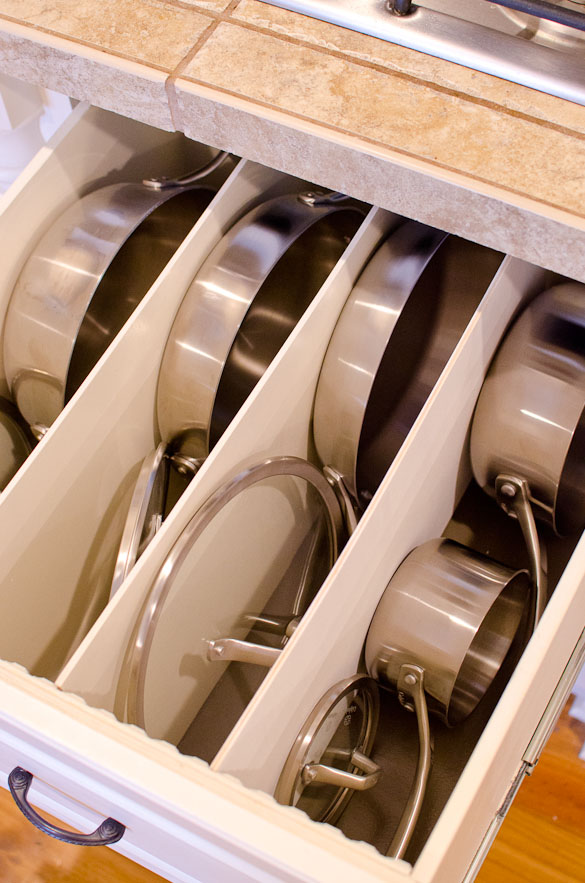
STEP 11: Replace the drawer back into the kitchen and add your pots and pans! Then, enjoy the new ease of using them!
If you have any specific questions or need some clarification on any of these steps, just leave a comment below and we'll be sure to answer! 🙂
Wondering about the collection of pots and pans I use? I love love love my new set of Calphalon AccuCore Stainless Steel cookware. Calphalon generously provided me with the pieces I knew would suit my kitchen well, however, this post is not a paid promotional post. Thank you, Calphalon!

