

I grew up eating store-bought angel food cake and always loved its light and fluffy texture. It was a treat that I looked forward to my mom buying in the spring and summer. Once I grew up and moved away from home, I stopped with the tradition and never found myself buying it on my own.
Last summer I started reminiscing about those earlier days and decided that angel food cake needed to enter my life once again. But, now that I am more seasoned in the baking realm, I knew I could hunt down a recipe where I could make it at home instead. I found the perfect formula on Nicole's blog, which coincidentally appears (updated) in my newest addition to my bookshelf, The New Best Recipe cookbook. When I made it last summer, I snapped a very decent photo of it then it magically disappeared into "delete" world somehow. Hence, the delay in sharing the recipe with you.
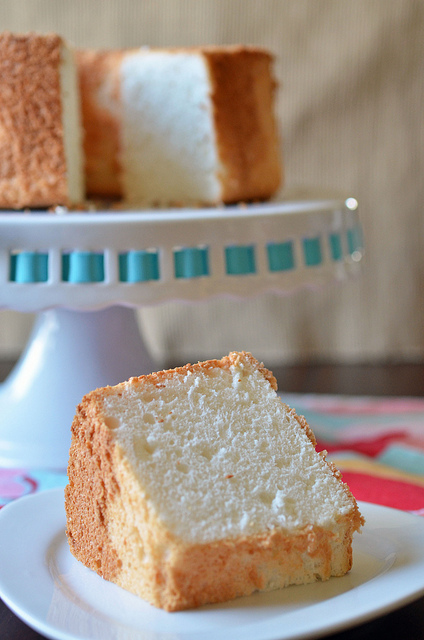
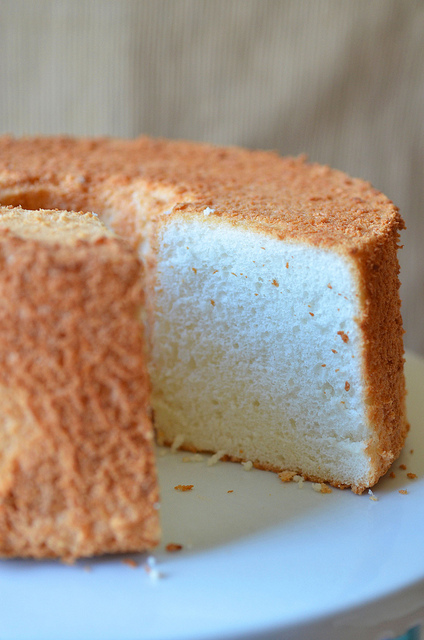
Angel food cake, when done right, is reminiscent of a spongy meringue with a golden crispy crust. It is sweet and chewy, and surprisingly melts into your mouth. And, although it is not as moist as most cakes, you can still eat it on its own or serve it with various toppings (at least one of which I'll be sharing soon).
You will need a tube pan with a removable bottom such as this one. I also make it the day before then release it from the pan the next day just before serving. It may seem like a difficult cake to make, but working carefully through it step by step, you will have the perfectly white spongy cake set on the table for all to see. When you accomplish this one, it's a cake of which to feel proud.
Recipe Card

Angel Food Cake
Ingredients
- 1 ½ cups egg whites (10-12 large), at room temperature
- 1 ½ cups superfine sugar , divided
- 1 cup sifted cake flour
- 1 teaspoon cream of tartar
- ¼ teaspoon salt
- 2 teaspoon vanilla
- ½ teaspoon almond or lemon extract
Instructions
- Preheat oven to 325 degrees F.
- In a small bowl, mix together the cake flour and ¾ cup of the sugar; set aside.
- In the bowl of a stand mixer fitted with the whisk attachment, beat the egg whites until frothy, about 1 minute on medium speed. Add the cream of tartar and salt, then beat on medium speed until fully incorporated. Begin to add the remaining ¾ cup of sugar, 1 to 2 tablespoons at a time. After the sugar has been completely mixed in, turn the speed up to medium-high and beat the egg whites until they reach soft peaks. Be careful not beat all the way to stiff peaks. Once the eggs reach soft peaks, stir in the vanilla and almond or lemon extracts.
- Sift the flour/sugar mixture over the egg white in 6 to 8 addition and gently fold in after each addition. It is better to take your time and do it gently than to rush and deflate the egg whites.
- Pour the batter into an ungreased 9-inch tube pan with a removable bottom. Smooth the top with a spatula and tap the pan on the counter once or twice to ensure that there are no large bubbles lurking beneath the surface.
- Bake for 50-60 minutes, until the top springs back when lightly pressed.
- Remove from oven and invert pan over a full 2-liter bottle. Allow to cool completely overnight.
- Gently run a thin knife around the sides, then around the bottom of the pan to release the cake when ready to serve.
- Source: Baking Bites, originally The Best Recipe
Nutrition

Cheryl says
Fantastic cake! Thank you! Excellent texture and flavor, and the guests loved the hint of lemon. I made just one tweak to the recipe--I've been reading about toasted sugar lately so thought I'd try it. I placed the 1.5 c superfine sugar in a heat-proof pan and baked at 325F for 20 minutes before using it in the recipe. I understand it makes the flavor less sweet and can add a slight caramel flavor to the baked good (depending on how long the sugar is toasted).
Angie @ Bigbearswife says
That Angel Food Cake looks so nice. Wonderful recipe, and very neat, that it's make from scratch
Since it's It's National Angel Food Cake Day, we're having an Angel Food Cake Link-Up Party and would love for you to add this to the link-up party! I'f You'd like to Come link-up with us, you can here: https://www.bigbearswife.com/2011/10/angel-food-cake-pumpkin-roll.html
Jennifer @ Raisin Questions says
I just came across this post on Tastespotting today, and I'm glad I'm finding so many new angel food cake posts! I tried to make one over the weekend, but had a bit of trouble getting my egg whites to peak. I was thinking that the problem was that my mixing bowl was not quite dry, but I was also trying to whip them by hand. Since I still haven't come across a recipe that doesn't call for an electric mixer, I'm beginning to think maybe that was another problem! I also need a tube pan, so thanks for posting that link!
Sue Gladd says
Did you mention how lowfat it is as well as delicious?
Sue Gladd says
I think homemade angel food cake is the ultimate achievement for a baker, so much more than a pound cake, as good as that is! Yes, you can be rightfully proud, Nikki!
Heidi @ Food Doodles says
Yummy! My hubby loves angel food cake so I'll have to try this one out for him 😀
Carrie says
My grandma loves angel food cake, I think I need to make her one.
angie says
yumyum!
Dishes of Mrs. Fish says
I love angel food cake! Thanks for sharing this version. 🙂
Lauren at Keep It Sweet says
There is something about homemade angel food cake that is SO good!