

 I'm excited about these cookies and the following tutorial. Recently, I discovered a fun way to package my sugar cookies so they can be hand-delivered or safely mailed. Just by picking up a few items at the dollar store and then using other things I always have on hand, I am able to create a very presentable treat box instead of purchasing a gift box that is probably overpriced without a pleasing appearance. Making them myself allows me the liberty to choose how I want it to look.
First, let's talk about the Father's Day cookies. I used a spiced sugar cookie recipe for the first time and really enjoyed it. The shape keeps pretty well and the taste is unbeatable. Although it is more of a fall flavored cookie, I thought it was perfect for Father's Day because the spices involved seemed to add a little bit of manliness to them. But, since this post is more about how to package the cookies, I'll share the recipe another time.
Now, on to the tutorial. I'm assuming you all are visual people, just like myself, so you will see a "few" photos below. Each photo will be explained with a caption underneath. Since I might go cross-eyed in the middle of them all, there is a chance I could miss something or not clearly explain something. So, if you have any additional questions or need any more clarification, please leave a comment and I'll answer it as soon as I'm able. 🙂 Here we go...

This is the pretty packaging we're trying to achieve. Of course, this one is a little more on the masculine side...it's for Father's Day after all. 🙂
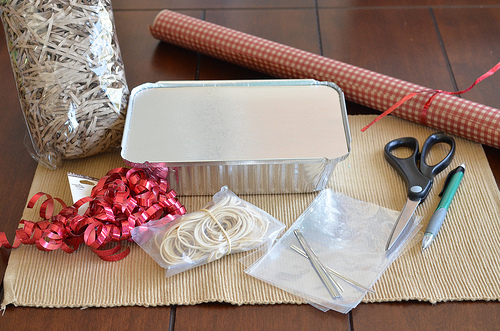
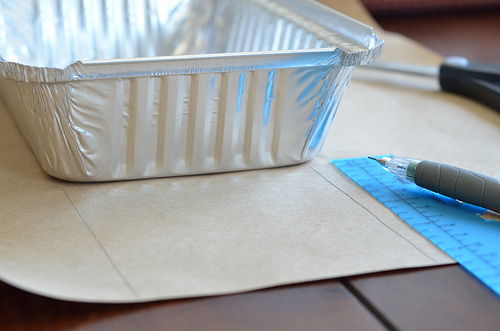
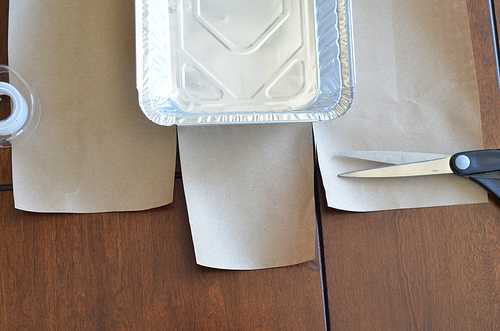
The supplies:
- Foil carton with lid (3pk available at the dollar store)
- Gift wrap of your choice
- Shredded Paper (also available at the dollar store)
- Gift bow of your choice
- Rubberbands or ribbon of choice
- Cellophane treat bags and twistie ties
- Scissors
- Pencil
- Double-sided tape
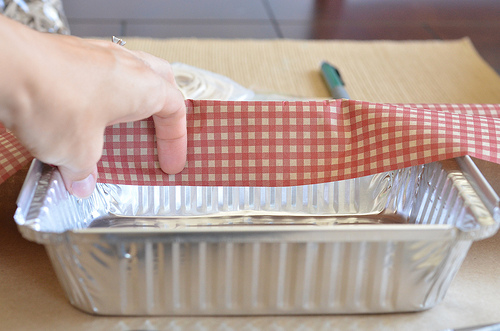
Cut out a rectangular piece of the gift wrap so that it folds about 2 inches over the insides of the foil carton.
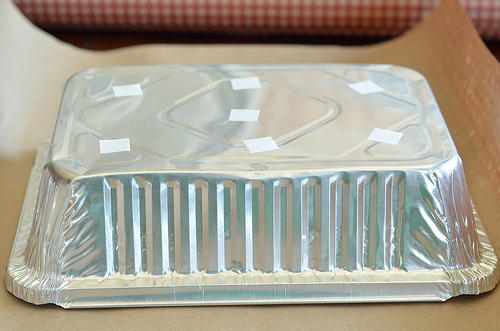
Flip over the foil carton and place double sided tape on the bottom...
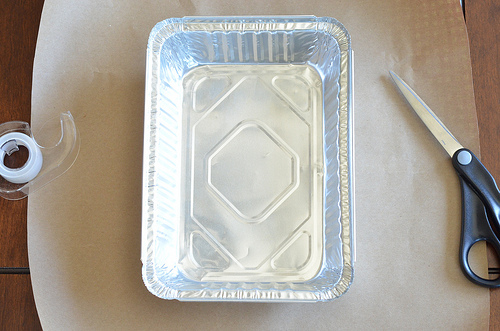
...then flip it back over and stick the carton in the middle of your rectangular piece of gift wrap. This will hold the carton in place while you wrap it.
Next, use a ruler and pencil to draw a straight line from the edge of the short side of the carton to the edge of the paper. You might have to come back and read this after reading the next few steps in order to fully understand it.
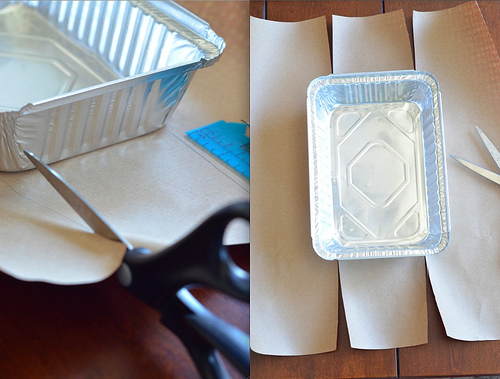
Use scissors to cut those lines you just made. Repeat with the other short end. (Again, if you do not understand, read the next step before giving up.)
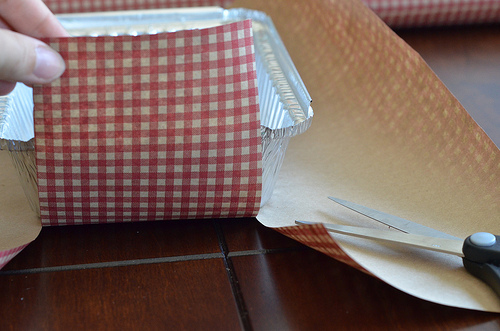
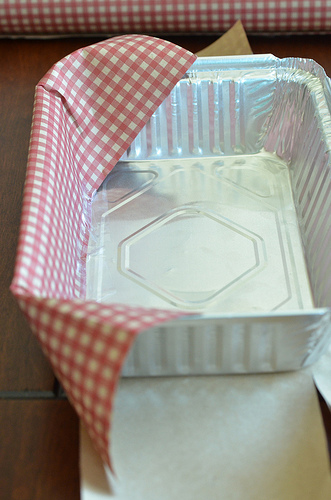
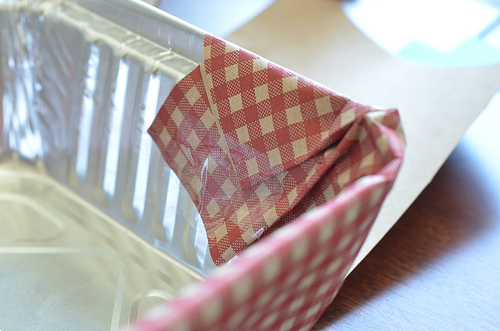
This is why we made those lines and cuts. Eventually we will pull this side over and tape it. But, not quite yet...just let it sit there for now and continue...
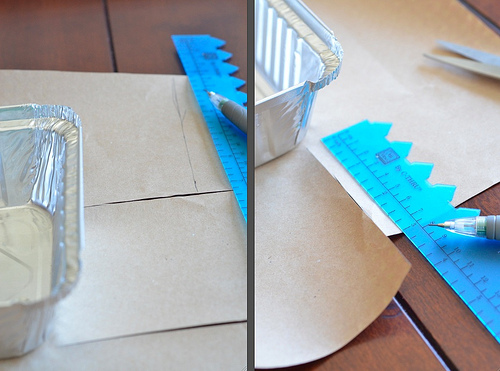
On the outside flaps, draw another straight line about 3 inches from the short edge of the carton (perpendicular to your cut). Then use scissors to cut these and you'll end up with this on both ends:
Now, go read those last few steps again and see if you understand it better the second time around. 🙂
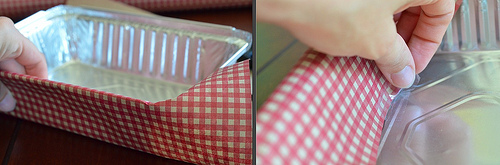
We have now made all of our cuts and are ready to wrap the carton. Start with one of the longer sides first, and pull up the wrapping paper then fold it over into the inside edge and tape it.
Make sure you tape it down so it is flat and pretty.
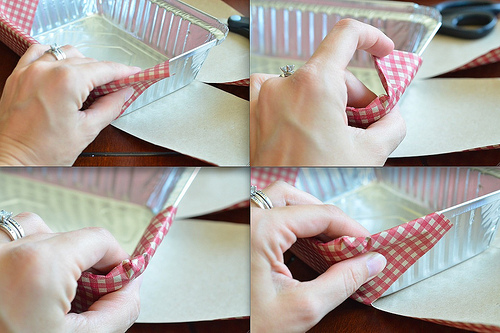
Working one side at a time, fold the ends of the paper over the short edges and...
...secure with tape.
Repeat for the other long side...
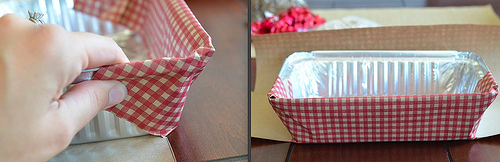
And you will have a carton with two flaps left on the short ends. Take each flap and fold it over...
...then secure with tape.

This is our empty wrapped carton. If you've messed it up by now, throw away your paper and cut out a new one to start again. Don't give up! I couldn't do it until my second try either. 😉

What should we put in this empty carton??
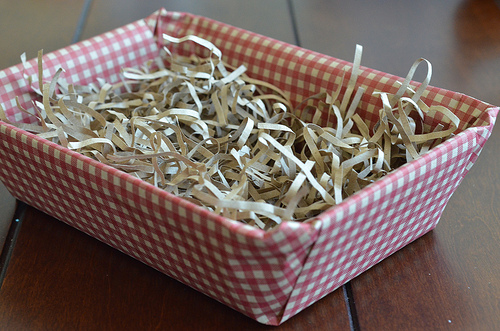
Shredded paper!
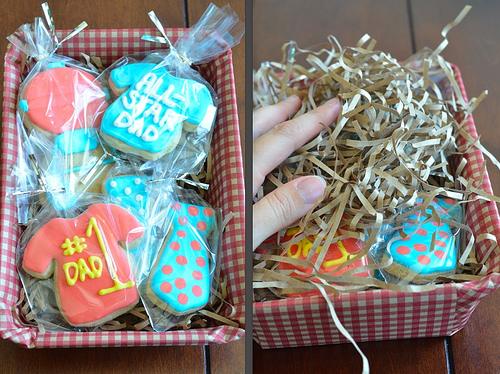 And cookies!! And, more shredded paper on top!
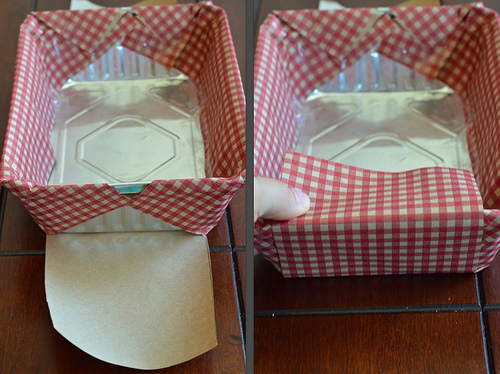
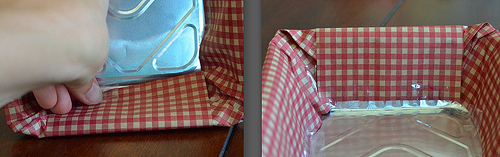
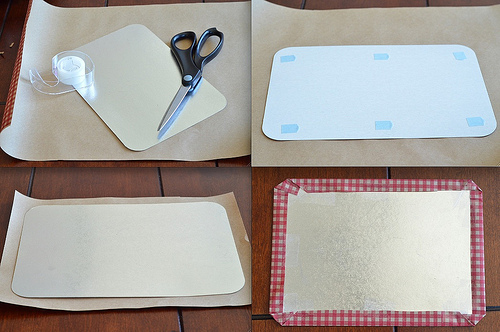 Now we need to make the top of the gift box. Take the foil lid and place double sided tape on it then stick it on the rolled out wrapping paper. Cut around the lid so there is about 1 inch of paper beyond the edges. Fold the paper over the edges and secure with tape. The top of the gift box is now ready!
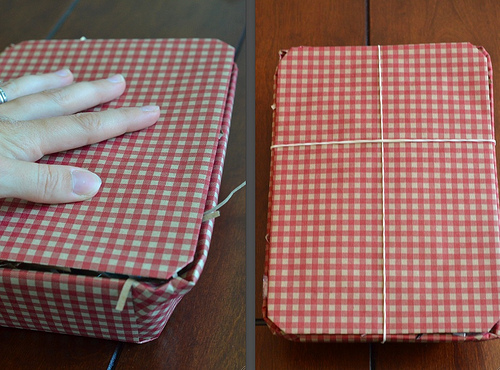 Place the lid on the gift box. Wrap two rubber-bands around the box to hold the lid in the place. Or, you can use your choice of ribbon for this step. I think men like rubber-bands more. 🙂
 Tape the ribbon to the top of the box and you're done!
I then placed these into mailing boxes and sent them off. Hopefully my dad and father-in-law are not reading this post yet, as they should be receiving their cookies in the mail...today!
**You might wonder why I went into so much detail for this simple tutorial. You are probably asking "why didn't you just tell me to wrap the carton?" I thought the same thing, but when I tried to "just wrap" the carton, it wasn't pretty. If you are trying to wrap a shoe box, then it is much easier because the edges are straight and the top and bottom are the same size. However, I found a shoe box is too big for what I was trying to achieve and came up with these very cheap foil cartons. Since the top is angled out from the bottom, you need to be careful in how to wrap it in order to create straight folds on the short ends, hence the photo-tutorial above. I hope this was helpful and that you will use it to create your own fun gift boxes! 🙂

ZAFIR ELENA says
it´s very nice,great tutorial!
sweetsugarbelle says
I love these cookies! ESPECIALLY the grill! And you discovered my secret! This is pretty much how I got 3-D cookies to Bakerella in one piece!
Erin says
This is such a cute idea. I would love to use this for many occasions!
Nolatari says
I have to tell you, this packaging is simply brilliant! You've inspired me to make cookies just so I can mail them to someone! And I don't even bake! How fun!
Sue Gladd says
Yep, Dad Gladd was impressed, and the cookie flavors "spiced up" his day! Thank you!
Amber says
This is an excellent idea! Thank you for sharing! 🙂 My sister shared your website and I love it, definitely a fan!
branny says
great tutorial!
sue says
The cookies are adorable and a very clever way to package them. Can't wait to give them a try 🙂
Xiaolu @ 6 Bittersweets says
These are too too cute and so creative!
Annie says
Cute idea, Nikki! I love this.
Rachel says
Super, super cute! What a great tutorial.
Shawnda says
Very cute packaging!
Sue gladd says
So fun seeing this project from start to finish, Nikki! I LOVE all the shapes but the grill is my favorite! Fathers will be impressed!