• Skip to primary navigation
  • Skip to main content
  • Skip to primary sidebar
  • Home
  • 4th of July
  • More Recipes
    • Breakfast
    • Easy Dinner Recipes
    • Appetizers/Snacks
    • Side Dishes
    • Best Dessert Recipes
    • Cookies
    • All Recipes
    • Categories
  • Travel
  • Shop

Easy Recipes for Family Time - Seeded At The Table logo

menu icon
go to homepage
search icon
Homepage link
  • About
  • 4th of July
  • Cookies
  • Appetizers/Snacks
  • Easy Dinner Recipes
  • All Recipes
  • Travel
  • Shop
  • Contact
×

Home » Course » Breads » Homemade Bagels

February 24, 2009

Homemade Bagels

This post may contain affiliate links. Read my disclosure policy.

Pin
Share
Tweet
Share
118Shares

Homemade Bagels

Ben has been on a bagel sandwich kick lately, so I thought "why not save money and make these bagels since I already have everything on hand?"

He makes himself a bagel sandwich for lunch every day, which is nice because since I have to be at work at 6 am (eeks!) I don't really have time to make it for him in the morning.  I must admit, that in the past I have felt a little bad about not making his lunch.  Don't get me wrong...I'm not the one to say "good wives always make their husband's lunches," but I'm also not on the ultra-feminist side that says "why should I have to make my husband's food when I work, too!"  In fact, I would love to make his lunch every day... if only I had the stamina.

Homemade Bagels 2

Well, I can feel a little better now that I made these homemade bagels.  Although, I can't say that I slaved over them, because they were SO easy! When I was searching for a bagel recipe, I came across a Peter Reinhart recipe on Smitten Kitchen's blog that looked very tempting.  But, I really didn't have time for that TWO day recipe since it was Sunday and Ben needed his bagel for lunch on Monday.  So, I found this one on Baking Bites and I am glad I didn't sacrifice two days.

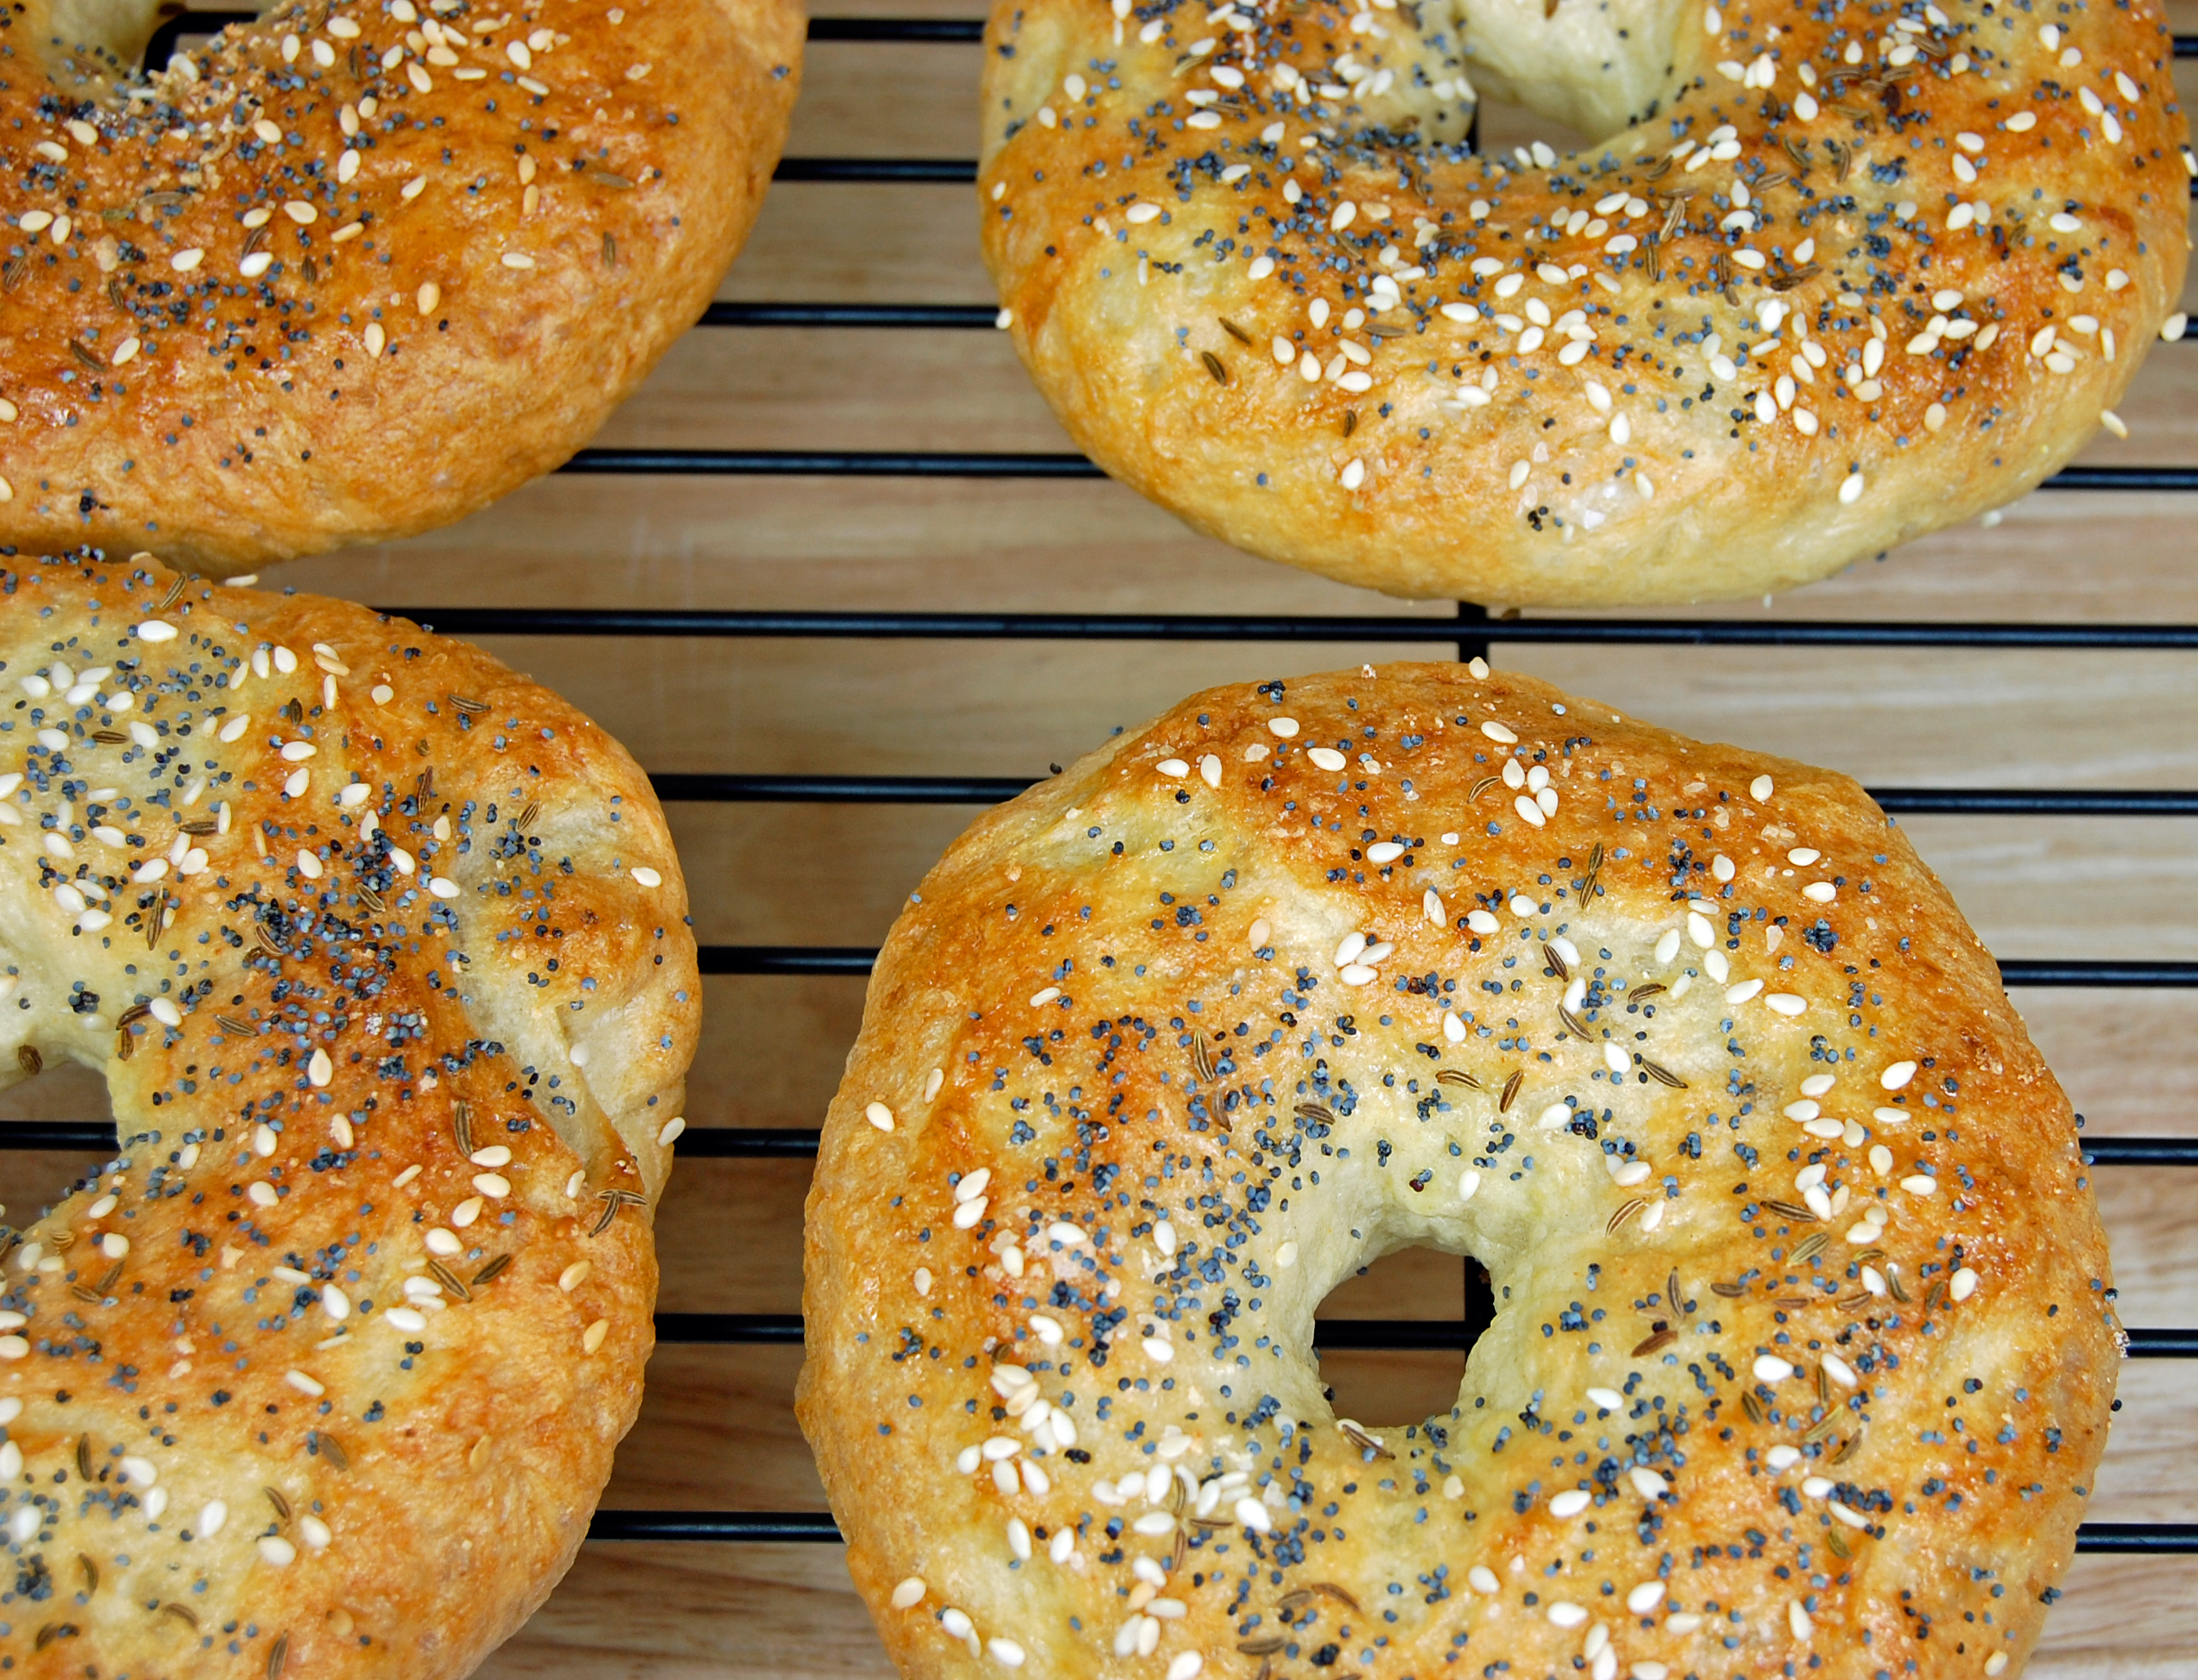
The original recipe is for twelve smaller bagels, but I wanted large sandwich size bagels so I made eight.  Recipe below includes my own edits.  Ben loves the 'everything bagel' so I added seasonings to this otherwise plain bagel.  He loved it!  I'll be making these every weekend until he gets over his bagel kick.

Homemade Bagels

Printable Recipe

1 tablespoon active dry yeast
1 tablespoon sugar
1 ¾ cups water, warm (100-110F)
4-5 cups bread flour (not all purpose)
1 tablespoon salt
1 egg, for egg wash

Optional Seasonings:
Poppy Seeds
Onion Powder (I used chives because I didn't have this on hand)
Caraway
Sesame Seeds
Kosher Salt

In a large bowl (or the bowl of a stand mixer) combine yeast, sugar and water. Let stand for 5 minutes, then stir in flour and salt. Mix dough thoroughly until it comes together in a large ball, pulling away from the sides of the bowl. Add an additional tablespoon of flour or water, if needed.

If kneading by hand, turn dough out onto a lightly floured surface and knead until very smooth and elastic, about 10 minutes. If using a stand mixer, knead dough with the dough hook until elastic, about 8 minutes on a low speed. Place dough in a lightly greased bowl, cover with plastic wrap and let rise for 1 hour, or until doubled in size.

When dough has risen, turn the dough out onto a very lightly floured surface and divide into 8 equal pieces (first quarters, then halves). Shape each piece into a tight ball, pinching the corners together at the bottom of the dough. When all the balls are shaped, let the dough rest for 30 minutes covered with a clean dish towel.

Once dough balls have rested, the bagel shape can be formed. Using your fingers, poke a hole through the center of each dough ball. Stretch out the dough into a ring with your fingers and be sure to make the hole a little larger than you want the finished bagel to have, as it will shrink slightly while the bagel is expanding during the baking process. Let bagels rest for about 10 minutes.

Meanwhile, bring a large pot of water to a gentle boil and preheat the oven to 400F. (I used a deep dish skillet because it's wider.)  Line a baking sheet with paper towels and another baking sheet with parchment paper sprinkled with cornmeal.

Working four at a time, drop the bagels carefully into the boiling water. Boil for 2 minutes on each side. Using a slotted spoon or strainer, transfer bagels to the paper towels to drain for a moment, then place on the parchment-lined baking sheet. Repeat process with remaining bagels.

Brush boiled bagels with lightly beaten egg (a pastry brush is a good tool for this) and sprinkle with seasonings. Bake for 24 minutes, or until golden brown.  Cool completely on a wire rack (bagel will soften slightly as it cools).  Slice and toast to serve.

Adapted from Baking Bites

Pin
Share
Tweet
Share
118Shares
« Cinnamon French Toast
Chinese Sundaes »

Favorite Recipes

a serving of strawberry layered dessert garnished with cool whip and a whole strawberry and pretzel twist
sugar sprinkled over stack of brownies
sliced almond crusted pork on a plate with salad greens
overhead of chicken tacos in flour tortillas and toppings

More Family Favorites

Seed at the table family photo

About Seeded At The Table

Thanks for visiting! We’re the Gladd family! We love donuts, Disney, LEGO and Jesus. Not in that order, of course. 🙂 Ben shares DIY wood-working projects and Nikki shares delicious recipes. You’ll also find a sprinkling of travel adventures and other family fun ideas!

Learn more about me →

Reader Interactions

Comments

  1. TeresaJ says

    August 04, 2011 at 8:55 am

    Hi Nikki! I just wanted to let you know that I mentioned you and this post on my blog today. Thanks for posting such fun stuff!! I can't wait to make these and I found a recipe for homemade cream cheese that I'm sure will be great with them. Thanks again!
    https://jackatessa.wordpress.com/2011/08/04/whats-for-breakfast/

    Reply
  2. Becky says

    February 03, 2011 at 1:29 pm

    Thanks for the link, Nikki! The bagels were so great, and I'm really glad it only took a morning to make and not 2 days! I'm going to make some asiago cheese ones this weekend 🙂

    Reply
  3. Becky says

    February 01, 2011 at 11:30 am

    Hi! I discovered your blog a month or so ago, and I love it! I'm glad all of my exploring could benefit your friend! My husband works in a ministry to college students, too, and I love having them over and cooking for them!

    Have you ever made these with instant/rapid rise yeast? Should I do something different if I use that instead of regular?

    Thanks!

    Reply
    • Pennies on a Platter says

      February 01, 2011 at 11:46 am

      Hi Becky,

      Thanks for the kind words!

      To answer your quetion, if using instant yeast you should be able to just add it to the dry ingredients and not have to "proof" it first in the sugar water. Also, use a little less of the yeast, making sure to add the same amount of liquids to the recipe even though you're not using it to proof. Here is a link that I have found helpful regarding the different types of yeast out there (which can be very confusing especially since different brands use different names). 🙂 Hope this helps! https://www.thefreshloaf.com/faqs/baking/yeast

      -Nikki

      Reply
  4. Christy Mensi says

    January 12, 2011 at 4:49 pm

    I just made these and they turned out PERFECT!!!! Felt like it took all day (waiting for the dough to rest, etc.), but it was so worth it. We're about to have warm buttered bagels for dinner!

    Reply
  5. myndi says

    December 01, 2010 at 12:09 pm

    could you make a pumpkin bagel with this recipe or would I need to change it because of the consistency of the pumpkin?

    Reply
    • Pennies on a Platter says

      December 01, 2010 at 8:00 pm

      Hi Myndi,

      I'm not sure. I haven't made pumpkin bagels and I'm not comfortable enough to give advice on adding the pumpkin. Sorry!

      -Nikki

      Reply
  6. myndi says

    November 15, 2010 at 10:07 pm

    my husband loves cinnamon bagels. How much cinnamon would I use for this recipe?

    Reply
    • Pennies on a Platter says

      November 15, 2010 at 10:43 pm

      Myndi -

      I haven't made cinnamon bagels, so I'm not sure. Sorry!

      Nikki

      Reply
  7. Ona says

    January 09, 2010 at 2:38 pm

    How do you store them so they're good for the week?

    Reply
    • Pennies on a Platter says

      January 09, 2010 at 5:52 pm

      Hi Ona,

      I just store mine in a Ziplock bag. After a couple of days I'll throw them in the fridge. You can also freeze them for longer use!

      -Nikki

      Reply
  8. kim says

    October 31, 2009 at 11:36 am

    Uh.... Not wanting to make your husband's lunch when you work too is "ultra-feminist". Gee I never really thought of myself that way. Heck I'd love to stay home and cook for hubby but since I have to work, he's on his own.

    Reply
  9. Emily says

    May 08, 2009 at 10:13 pm

    Wow, this is the only bagel recipe I've tried that actually worked - and they didn't deflate! Very yummy, thanks!

    Reply
  10. Rhonda says

    May 03, 2009 at 6:32 pm

    Why do you have to use bread flour and not all purpose? Will it make that much of a difference?

    Reply
    • Pennies on a Platter says

      May 06, 2009 at 8:16 pm

      Hi Rhonda,
      The bread flour adds to the chewiness texture of the bagel. For many recipes you can substitute it with AP flour, but for this bagel recipe, I wouldn't recommend it. If you try it, let me know how you like the results! 🙂

      Reply
  11. Mfajita says

    April 08, 2009 at 10:02 am

    These look delicious!! I was at a market on Saturday and got some bagels that looked similar to these and now I just have to make some! Yours look perfect...if I can get them half as nice yours, I will have attained. 🙂

    Reply
  12. Nikki says

    April 06, 2009 at 7:32 pm

    I made this yesterday, but switched things up a bit to make honey wheat bagels. This recipe was excellent - easy and versatile. Thanks!

    Reply
  13. D. From the OC says

    March 03, 2009 at 6:33 pm

    Hello- I just made these, relatively easy and VERY good ! Mine are just not as pretty as yours.. I think I may need to spray the parchment paper prior to setting them down ... VERY GOOD ! I will make them again!

    Reply
  14. Amber says

    March 02, 2009 at 8:12 am

    I have always wanted to make homemade bagels but have never gotten around to it yet. These look incredible! Great job.

    Reply
  15. Julie says

    February 28, 2009 at 8:07 pm

    Those look so yummy! I love the everything bagels you buy in the store, and I'll bet these are even better!

    Reply
  16. Nathalie says

    February 26, 2009 at 2:27 am

    Thank you for your answer! I'll follow the recipe to the letter then and let you know how it turned out. As I already bake my own bread, I'm sure they'll be great! 🙂

    Reply
  17. Hayley says

    February 25, 2009 at 8:20 pm

    These look gorgeous! I just love baking my own bread. Thanks for sharing!

    Reply
  18. carrie says

    February 25, 2009 at 5:45 pm

    They look great. The recipe looks really easy. I think I will have to try them. The everything bagel is one of my favorites.
    Thanks for sharing.

    Reply
  19. Nathalie says

    February 25, 2009 at 10:05 am

    What a fantastic recipe! I've got a question though: why do you drop the bagels into boiling water before baking them? Is it for the bagel to keep its shape while in the oven?

    Reply
    • Pennies on a Platter says

      February 25, 2009 at 4:14 pm

      Hi Nathalie! The boiling of the bagel makes for a firm, crispy crust while keeping the inside chewy. Something about the chemistry of starch and the boiling water making a protective outer coat for the bagel. If I was more scientific, I may be able to explain in more detail...but trust me, it's worth the extra step. 🙂

      Reply
  20. Tracey says

    February 24, 2009 at 10:27 pm

    I've been wanting to make homemade bagels for a while and this looks like a great recipe! Nice job!

    Reply
  21. Amy (Sing for your supper) says

    February 24, 2009 at 10:03 pm

    I have a tremendous fear of all things "yeast-y", but I may just have to give these a try soon...these seem like a pretty easy recipe to start with. (*famous last words!) They really look great - nice job!

    Reply
  22. Rina says

    February 24, 2009 at 10:00 pm

    Whoa lady good job!! Bagels have always been something that I never ever thought I could do...you've given me hope!

    Reply
  23. brannyboilsover says

    February 24, 2009 at 7:09 pm

    Looks great! I recently conquered bagels, too!

    Reply
  24. mom says

    February 24, 2009 at 5:21 pm

    Wow Nikki, these look scrumptous! Ben has good taste.

    Reply
  25. Jaime says

    February 24, 2009 at 4:31 pm

    wow those look better than the ones in panera!

    Reply
  26. adamswife06 says

    February 24, 2009 at 3:58 pm

    I think I am going to try these this weekend!

    Reply
  27. Kathleen says

    February 24, 2009 at 3:53 pm

    Those look fantastic AND sound doable! Nice!

    Reply
  28. Rachel says

    February 24, 2009 at 10:59 am

    I cannot wait to try these! I love bagels...yum!

    Reply
  29. Chelle says

    February 24, 2009 at 10:46 am

    These look so good! I made the two-day Peter Reinhart recipe and to be honest, yours look better than those did 😉 I can't wait to try this recipe!!

    Reply

Leave a Reply Cancel reply

Your email address will not be published. Required fields are marked *

Recipe Rating


This site uses Akismet to reduce spam. Learn how your comment data is processed.

Primary Sidebar

Search for Recipes

© 2022 · Seeded at the Table · Home · About · Contact · Privacy Policy