

These homemade breadsticks are labeled by my family as "Better Than Pizza Hut Breadsticks". We love Pizza Hut breadsticks, but this easy copycat recipe steps it up a notch and is ALWAYS fresh out of the oven!
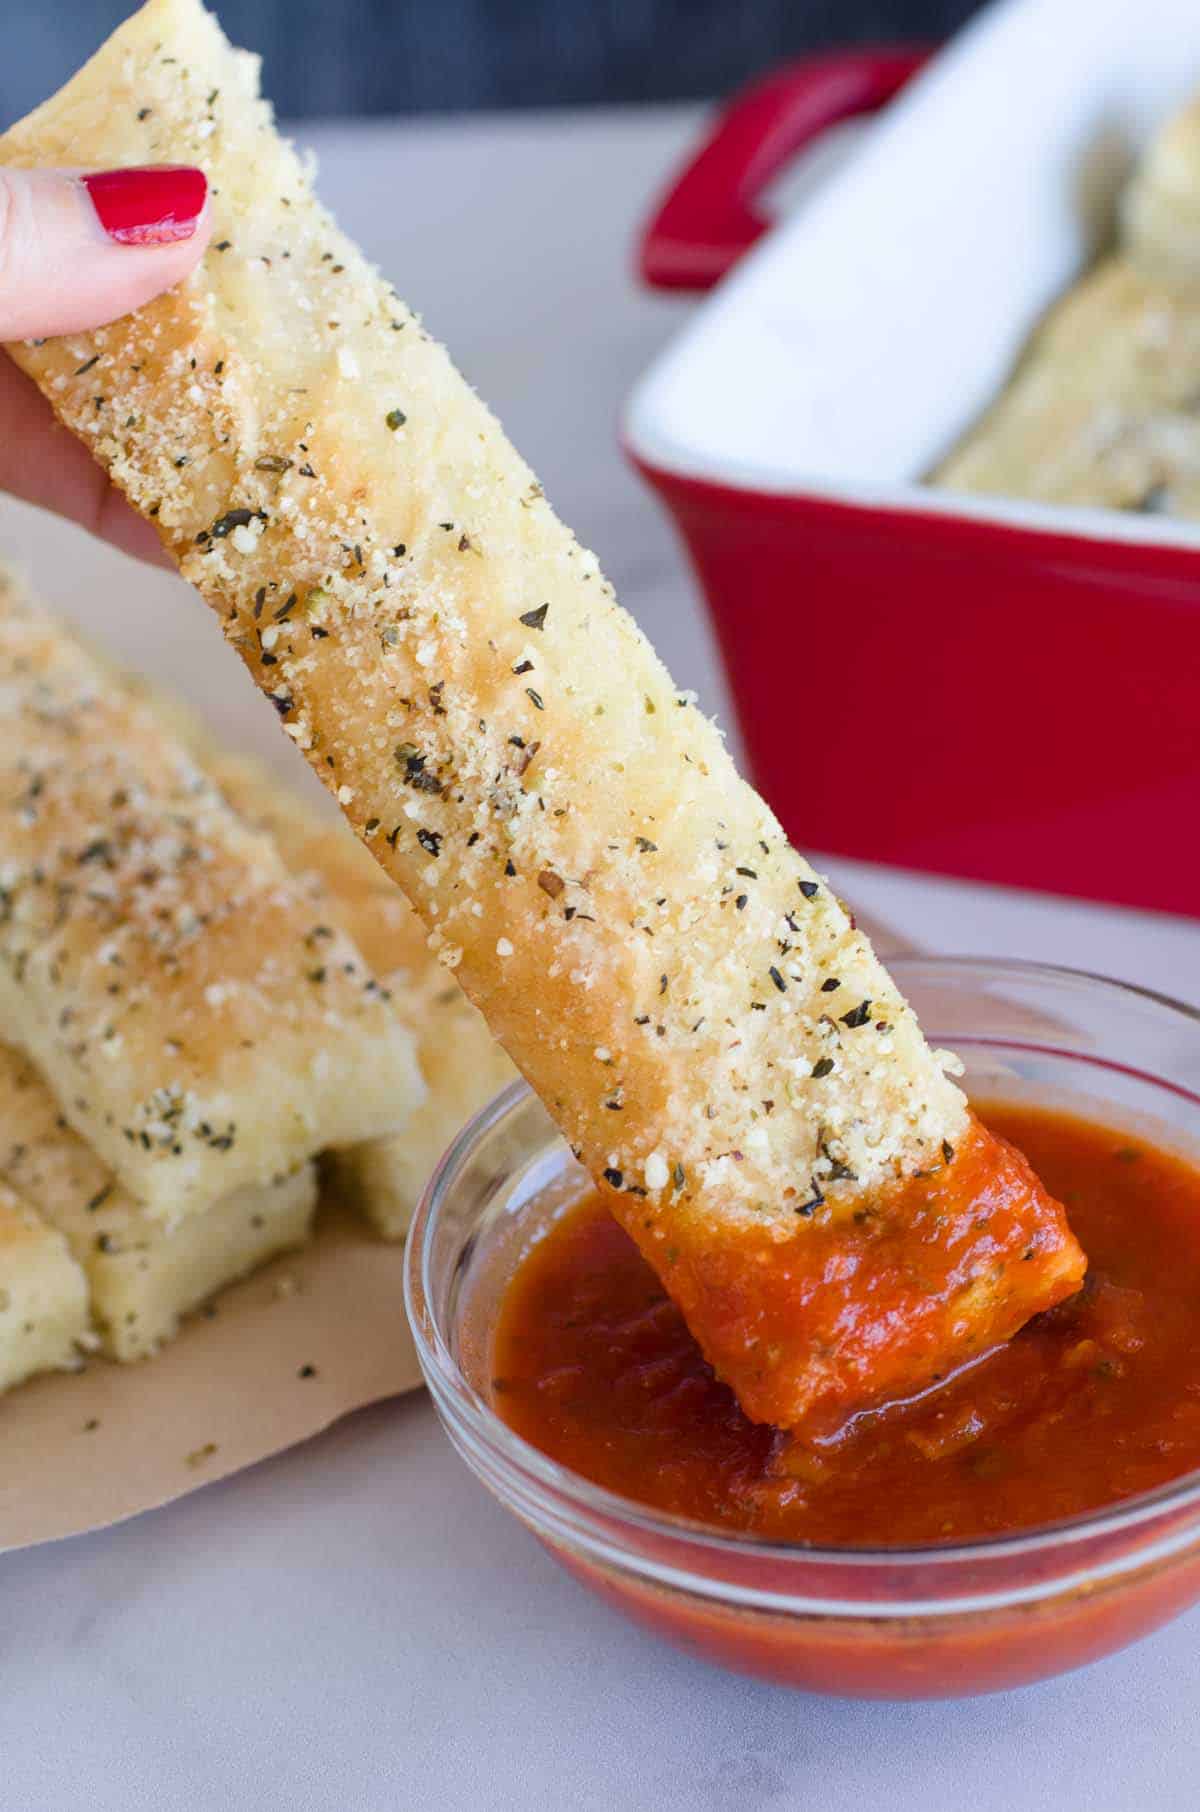
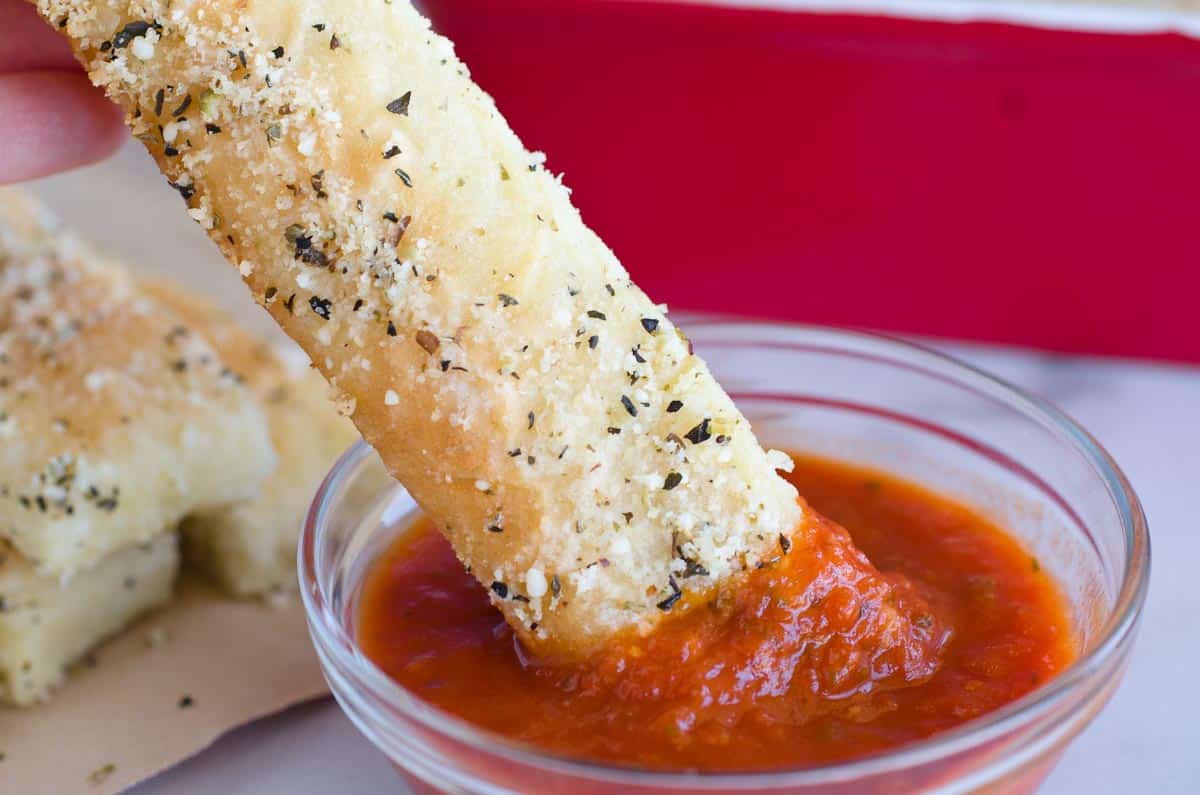
Pizza Hut Breadsticks were a Friday night staple in my home for quite a few months in a row. That buttery garlic Parmesan topping is irresistible! We still order them on pizza night every once in a while, but I do love a homemade breadstick recipe -- especially an easy one like this. Because these delicious breadsticks are always hot and fresh out of the oven, we think they are even better than Pizza Hut! You can even dip them in our simple tomato sauce.
 Pizza Hut Breadsticks Recipe
My copycat recipe for Pizza Hut breadsticks uses a simple yeast dough and bakes in TWO buttery 9x13-inch pans. We typically eat one of the pans and then freeze the leftover breadsticks for the next time we have pizza night. We've been using this recipe for years.
Pizza Hut Breadsticks Ingredients
(full printable recipe at end of post)
For this recipe, you need simple ingredients for the dough and then a mixture of seasonings for the topping.
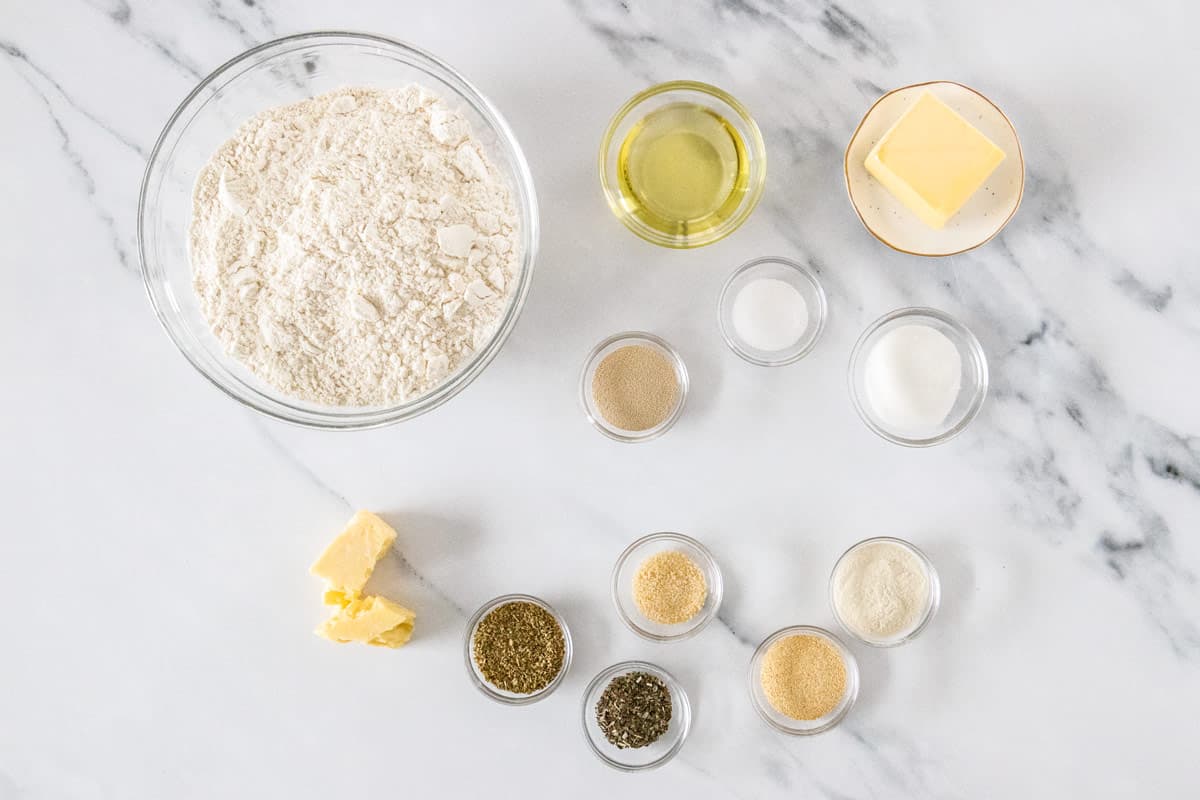
Here's What You Need:
- Warm water -- The water temperature should be between 110°F to 115°F. Warm enough to dissolve the yeast, but not too hot to kill it.
- Sugar -- Only a little to help give the yeast a good start.
- Olive oil -- For flavor and texture.
- Salt -- For flavor.
- Flour -- Just regular, all-purpose flour.
- Butter -- For the crispy buttery edges.
- Seasonings -- For the delicious topping. (Parmesan cheese, garlic, onion, oregano, basil.)
How to Make Pizza Hut Breadsticks From Scratch
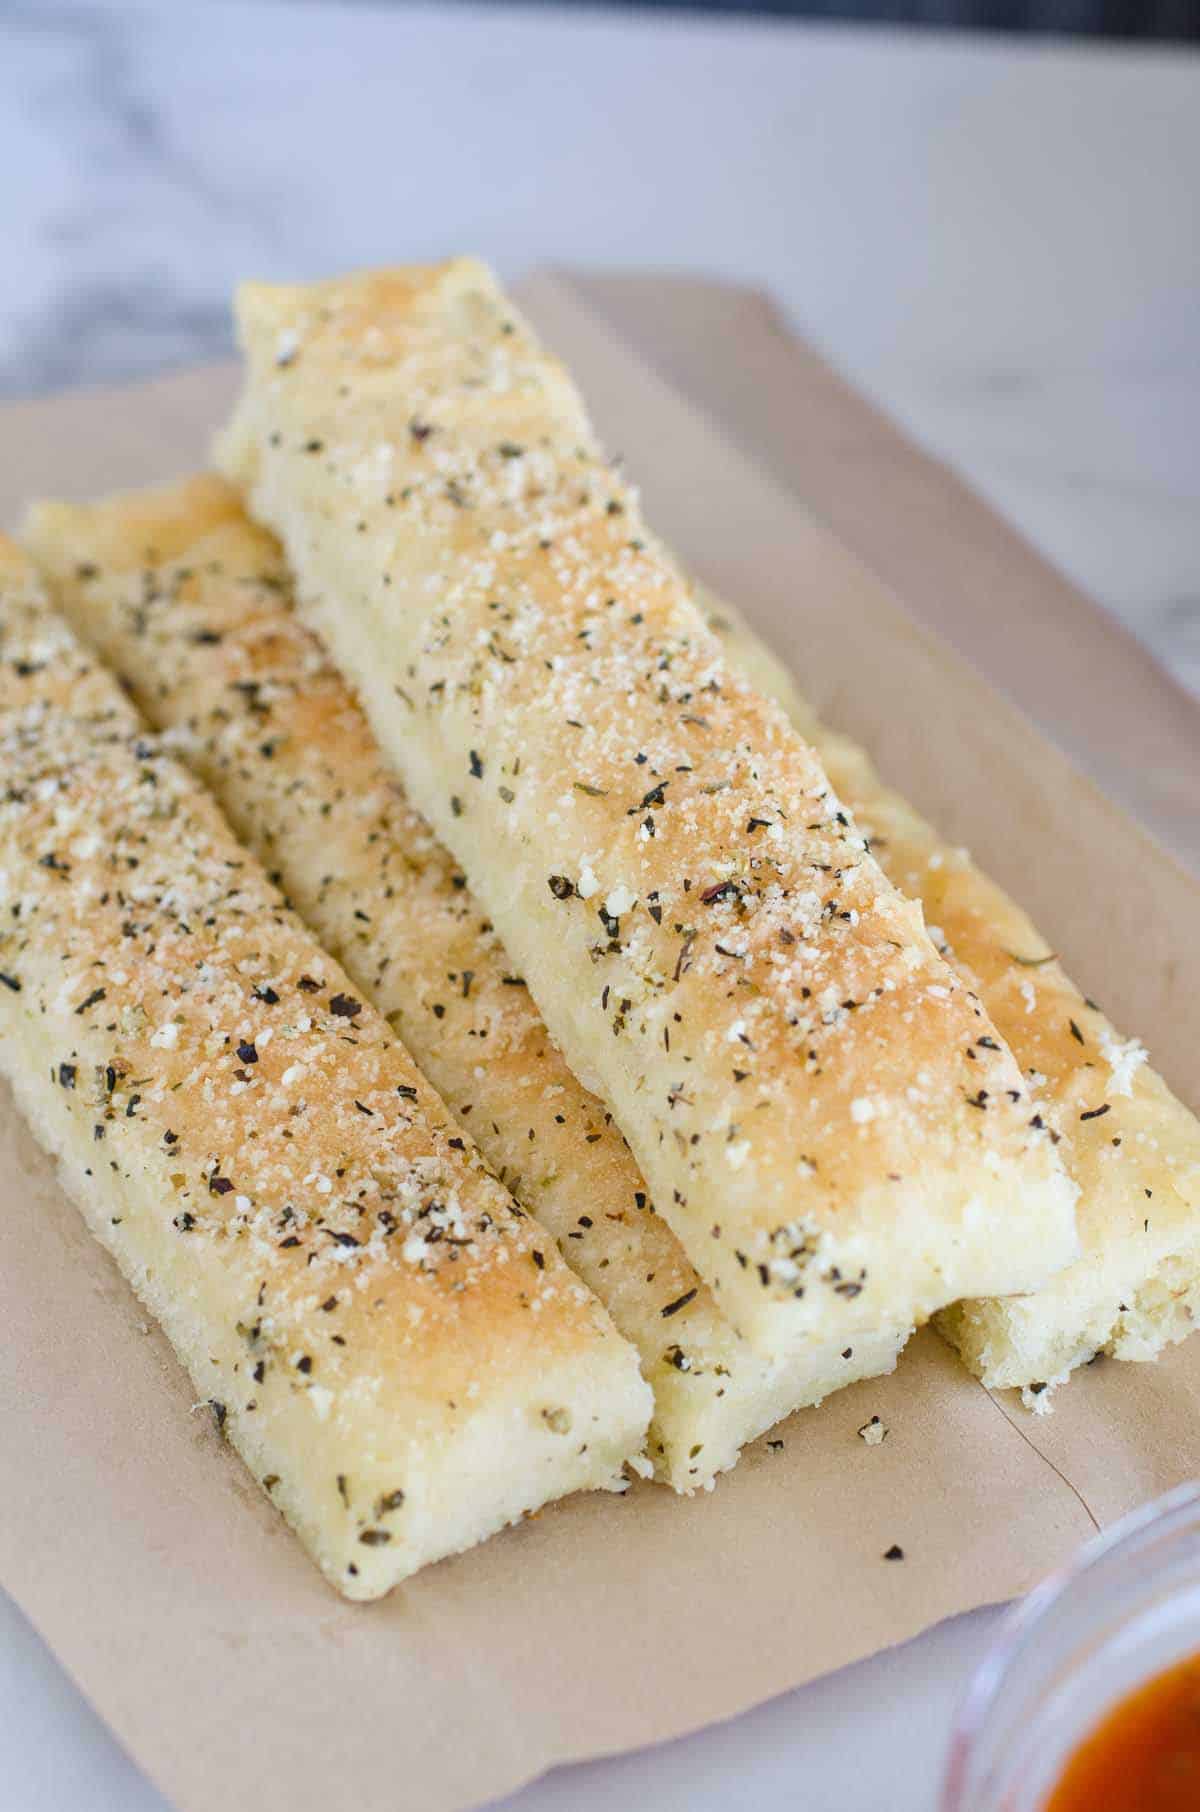
When I first started making these Parmesan breadsticks years ago, I didn't do one essential step -- butter the pan. They turned out fine, but they were lacking that crispy buttery outer edge that I love with Pizza Hut breadsticks. Although that breadstick recipe was good, I revised it here to make it even better and more like a Pizza Hut copycat.
Equipment
For this recipe, you need two 9x13-inch baking dishes, unless you plan to use half the dough for making a pizza. Then, just grab one baking dish. You also need a large mixing bowl, a mixer with a dough hook, pastry brush and sharp knife.
Instructions
Scroll to the end of this post for a full detailed recipe card. The general steps are as follows:
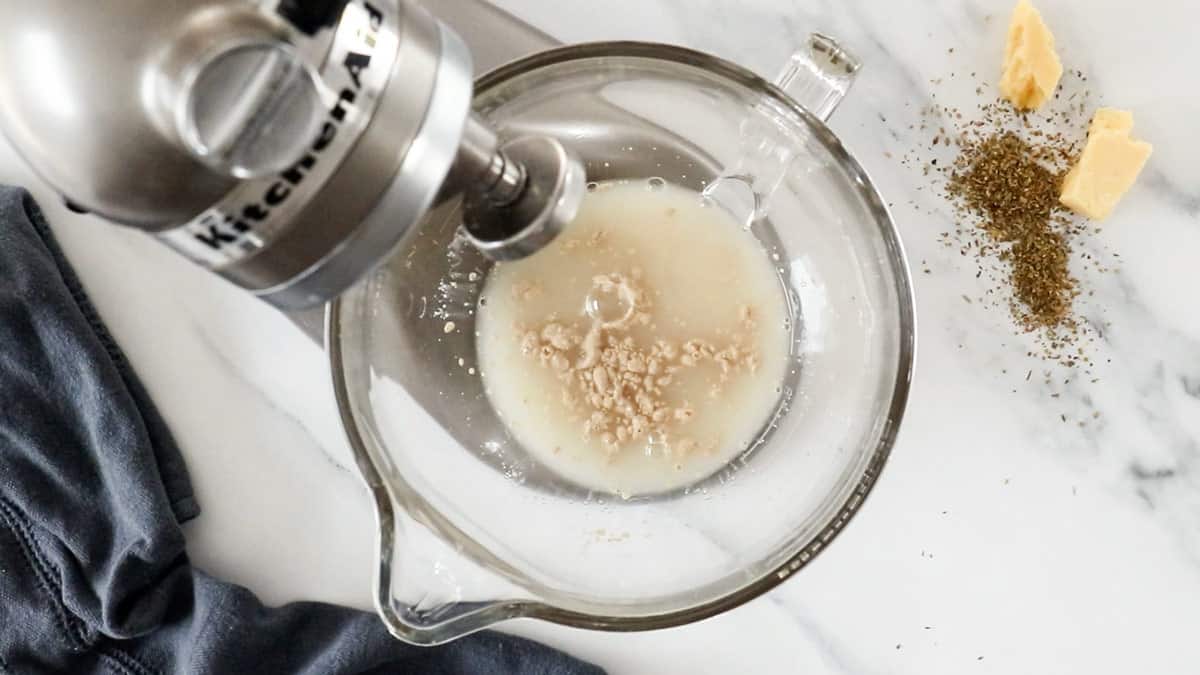
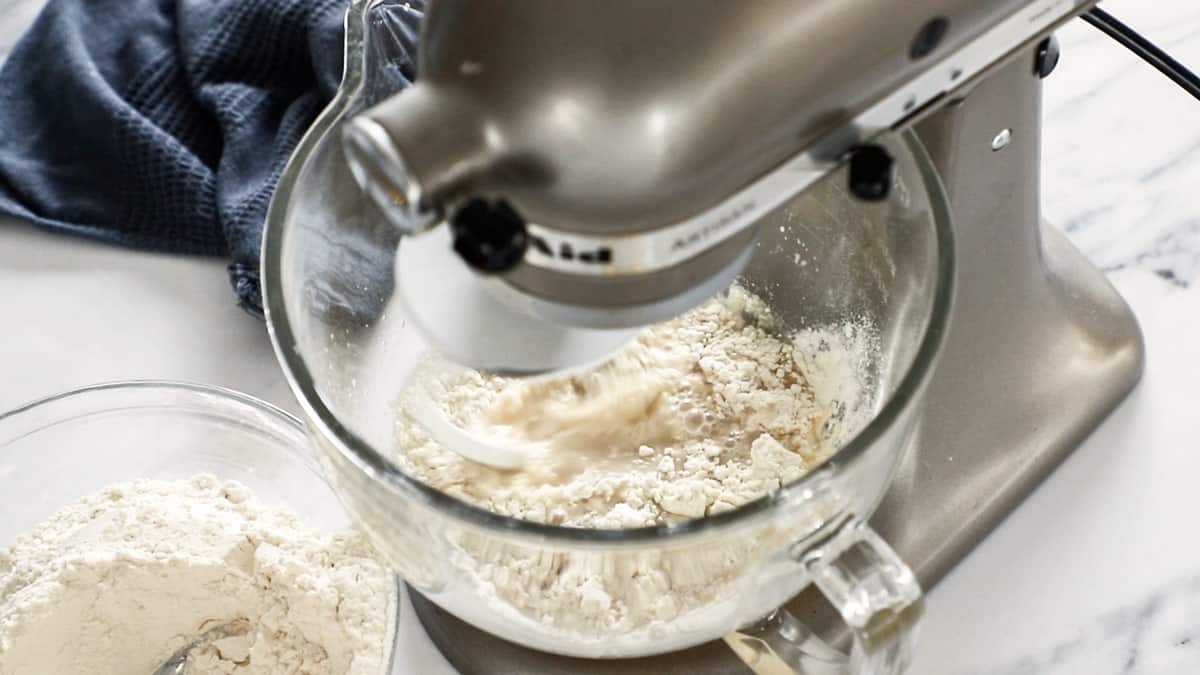
- In a large mixing bowl, combine the water, sugar and yeast. Let rest for 5 minutes.

- Stir in the olive oil and salt.
- Gradually add the flour until a dough forms.
- Knead with mixer until tacky, about 5 minutes.
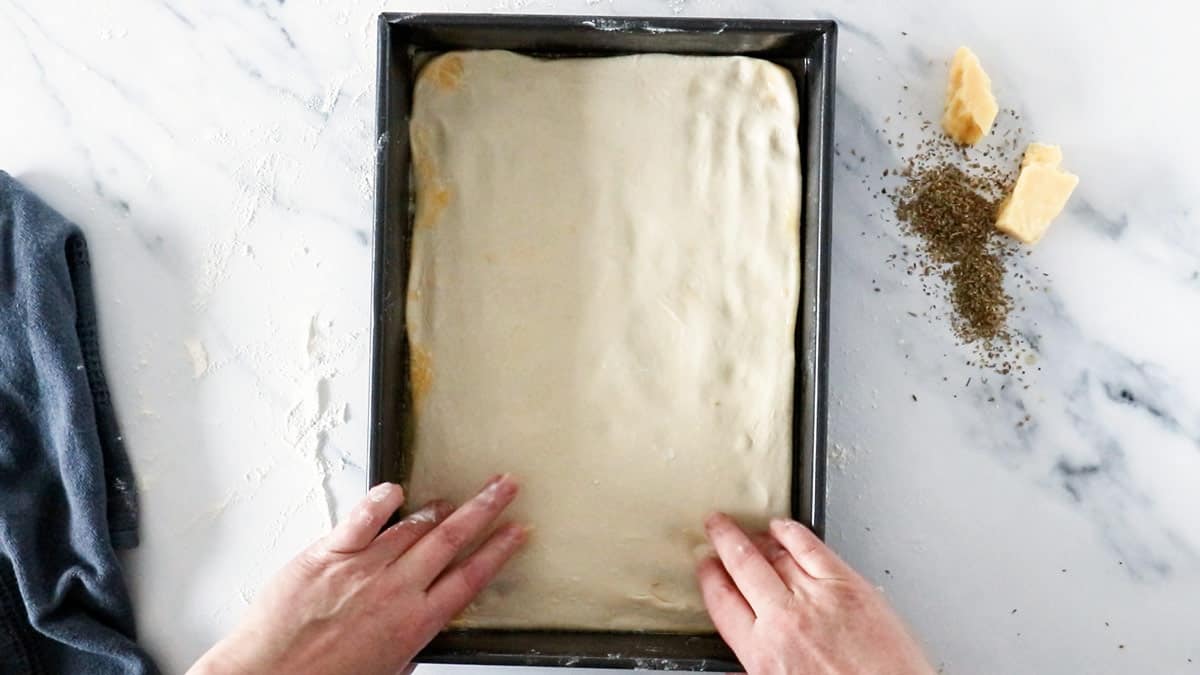
- Divide dough in half and press into buttered pans.
- Brush with butter, cover, and let rise.
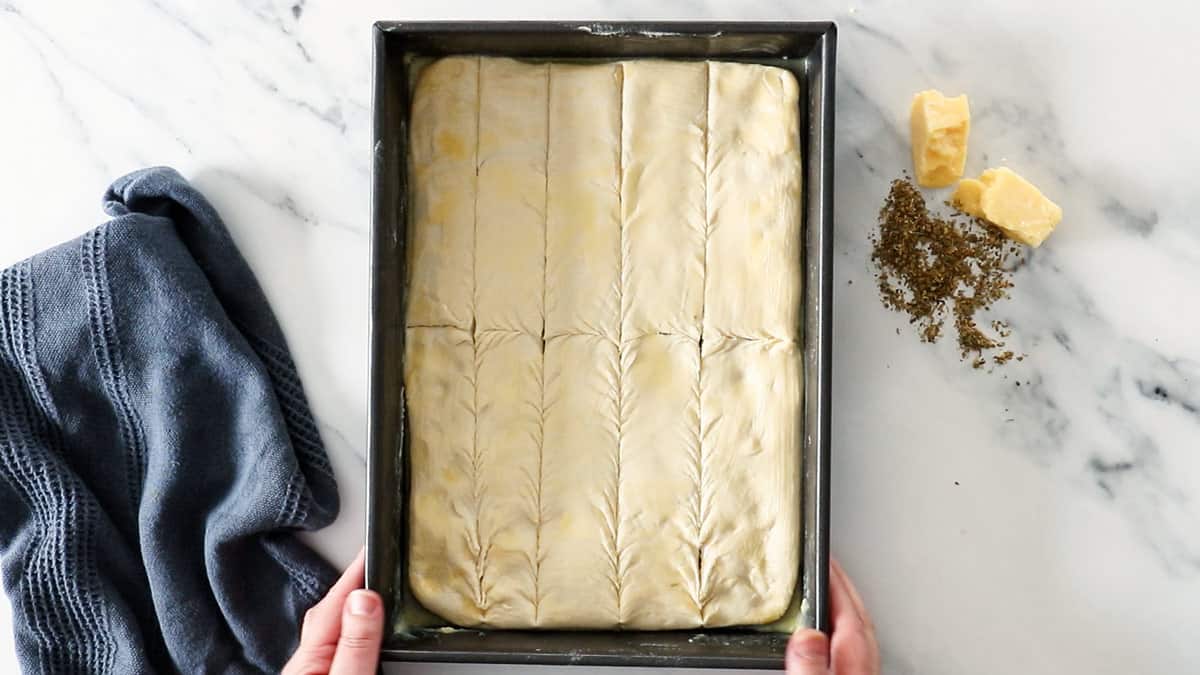
- Score with knife and bake 10 minutes.
- Brush with butter and sprinkle topping.
Copycat Pizza Hut Breadsticks - Double Order!
This breadstick recipe yields a large amount of breadsticks as the dough is baked into TWO 9x13-inch pans. This is perfect for us as we always get the double order of breadsticks at Pizza Hut from their $5 menu. With this homemade recipe, you get quadruple of Pizza Hut breadsticks!
We typically eat one pan and then freeze the leftover breadsticks in a freezer bag for our next pizza night. They reheat really well in the oven at 350°F for just 5 to 10 minutes. We can take out however many we want from the bag and bake it straight from the freezer.
Pizza Hut Breadstick Seasoning
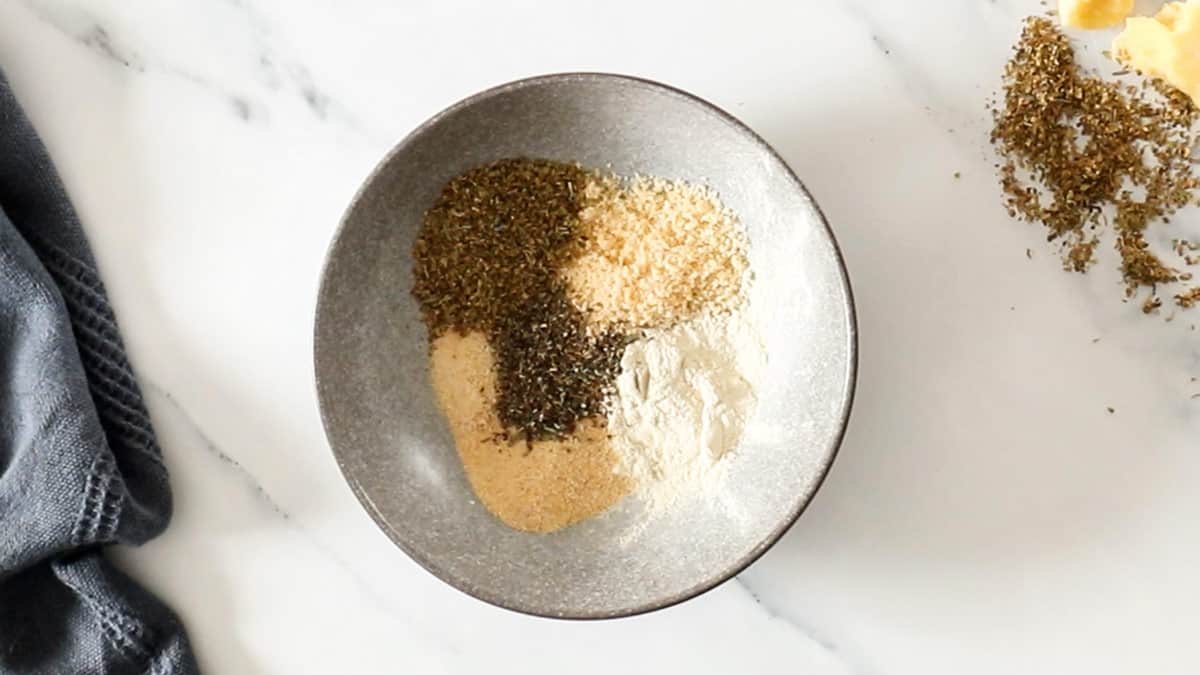
The Parmesan seasoning on these breadsticks is so good! It makes a bunch, so you can use as much or as little as you want. It's just a simple mixture of Parmesan cheese with dried spices and herbs. You can choose to add it to the breadsticks before or after baking. We typically add it after.
Marinara Sauce
Serve with marinara dipping sauce. These stand alone GREAT on their own, packed FULL of flavor! But, I do love dipping breadsticks into marinara sauce. For convenience, grab your favorite store-bought pizza sauce.
Or, try our simple homemade tomato sauce for dipping these breadsticks.
 Tips for Homemade Breadsticks
Add flour until dough is tacky. You want the dough to be tacky, not sticky. It needs to be easy enough to handle. Gradually add more flour while kneading in order to achieve the right level of tacky.
Use a metal baking dish for best results. I have made these in my Pyrex baking dish, my ceramic baking dish and my metal baking dish. They all turned out great, but my favorite results are in the metal baking dish with more even baking, a crispier edge and golden brown color.
Do not over bake. I tend to bake these right at 10 minutes, but if you like a drier and crispier breadstick then go to the 12 minute mark. Oven temperatures vary so you may need more or less time, just watch them.
Use half the dough for pizza. If you do not want two pans of breadsticks, use the other half of dough to make pizza! Simply skip the steps to butter a second pan and instead roll the dough out onto a pizza pan and top with desired toppings. Bake for around the same amount of time, depending on how thin you rolled your dough. Make sure to bake your pizza in the lower rack of your oven.
Other Favorite Pizza Night Recipes

- Thai Chicken Pizza
- Pizza Bites
- Cheesy BLT Pizza
- Chicago-style Deep Dish Pizza
- Fruity Brownie Dessert Pizza
Eat It, Rate It, Share It!
Made it and liked it? Leave a star rating, take a photo and tag me on social media @seededtable so I can share it!
This article was originally published February 2020 and updated with a new video in July 2022 with no changes to the recipe.
Recipe Card

Better Than Pizza Hut Breadsticks
Ingredients
- 1 ½ cups warm water
- 1 tablespoon granulated sugar
- ¼ oz. packet instant yeast (about 2 ¼ teaspoon)
- 3 tablespoons olive oil
- 1 teaspoon salt
- 4 cups all-purpose flour , more or less as needed
- 12 tablespoons unsalted butter , divided and melted
Breadstick Seasoning:
- 2 tablespoons grated Parmesan
- 1 tablespoon onion powder
- 1 tablespoon dried oregano
- 2 teaspoons garlic powder
- 1 teaspoon garlic salt
- 1 teaspoon dried basil
Instructions
- In a large mixing bowl, combine the water, sugar and yeast. Let rest 2 minutes. Stir in the olive oil and salt.
- Using the dough hook, gradually stir in 3 cups of the flour, until a dough forms. Increase speed to medium and mix for 5 minutes, adding more flour ¼ cup at a time until dough is tacky.
- Spread 4 tablespoons of melted butter in each bottom of two 9x13-inch baking dishes; set aside.
- Divide the dough in half. On a lightly floured surface, roll each half into a rough 9x13-inch rectangle and transfer to the buttered baking dishes. Press to fit into corners of the pans. Brush with 1 more tablespoon of melted butter each. Tightly cover with plastic wrap and let rise at room temperature for 1 hour.
- Combine breadsticks seasoning ingredients in a small bowl; set aside.
- Preheat oven to 475°F.
- Remove plastic wrap. Score each pan of dough into 10 equal breadsticks. Bake 10 to 12 minutes, until edges are golden.
- Remove from oven. Brush each pan with the remaining 1 tablespoon each of melted butter and sprinkle with breadsticks seasoning. Let rest 5 minutes then transfer to cutting board. Serve warm.
Video
Notes
- Store leftovers in a container at room temperature for up to 1 day. Or, freezer in a zipper bag for up to 1 month.
- Reheat in 350°F oven until heated through and reaches desired crispiness.
- Nutritional values are an estimate only, based on 1 breadstick per serving.

Jay says
This is my go to recipe for 2 years! It really is good, thank you!
Ashley says
So so good! I was craving Pizza Hut breadsticks and didn't want to spend the money on them. These were perfect! I won't add all of the seasoning mix on it, but other than that it was delicious! I love that it makes two pans so there's enough for leftovers!
Lindsay says
Delicious! Didn't think my family would need 20... but we won't have many leftover at this point!
Nikki Gladd says
haha! We have that same scenario! 🙂
Becky says
I’ve made these and they turned o out really good but it makes too many for my husband and I to eat now that the kids aren’t living at home anymore - can this recipe be cut in half without compromising the quality?
Nikki Gladd says
Hi Becky, I would suggest freezing half of them instead of trying to halve the recipe.
Cindy says
I would like to put mozzarella cheese on for the grandkids. At what step do I add the cheese? Thanks
Nikki Gladd says
Sounds like a delicious plan! You can try sprinkling mozzarella on right before baking.
Megan says
Question
I’ve made them up and now plan to cook, but time changed so wondering if I can stick them in pans in fridge for 4 hours then cook them later?
Or would that mess up the raising etc
Nikki Gladd says
Hi Megan, You can refrigerate the dough in the pans after the 1 hour rise and then let it set on the counter for 45 minutes before baking.
Dave says
These are fabulous....made them to go with spinach/Italian sausage lasagna. Very addicting...as soon as they are cool they'll be in a ziploc bag and hidden before we go through the whole batch in one evening!
Anonymous says
As a manager at pizza hut, we don’t use butter for the pan. We use oil.
Felicia Cowden says
I too worked at pizza hut for a few years and we did use oil but honestly the butter was a much better flavor in my opinion.
Joni says
Hi! If I want to make the dough today but actually bake tomorrow, how do you recommend I do that? Thanks in advance!
Nikki Gladd says
Hi Joni,
After the 1 hour rise, refrigerate the dough in the pan covered with plastic wrap. The day you want to bake it, remove from the fridge 45 minutes before baking to allow to come to room temperature. Then proceed with the steps to score and bake.
Jan says
My dough did not turn sticky so I added water. It hardly raised.
Ivy says
These are absolutely amazing! So similar to Pizza Hut breadivysticks! The spice mixture was spot-on! I have tried so many breadstick recipes, and they are never quite right; I end up going back to the freezer section at the supermarket for an acceptable side. Please try these, everyone! They definitely don’t disappoint! If you do, get ready to have roses thrown at your feet like you’re a rockstar!
Nikki Gladd says
Thank you for this review, Ivy! So glad you love them like we do!
Maggie says
I bought some pizza dough from Trader Joe's on a whim but didn't want to make pizza. I came upon this recipe and had to try it. It was fantastic. My kids loved it and my little one asked me to make these for his birthday. 🙂 I need to just bottle up the seasoning as that totally reminded me of Pizza Hut. Next time I'll actually make the dough from this recipe as the TJ's one didn't bake up as fluffy. Still amazing!
Nikki Gladd says
Thanks, Maggie! The seasoning is definitely the star of this recipe! 🙂
Danielle says
What the heck!!! I was not expecting them to be this good! Hands down the best homemade breadsticks out there! Thank you for the recipe!!
Nikki Gladd says
Ha! You scared me with your first sentence, then I kept reading and was so happy to hear you loved them! 🙂 Thank you for the feedback!
Celena says
These were delicious! We wanted them to add on to our pizza at home night and these were perfect. We only made one pan of them and used the other half of the dough to make Zeppole for dessert! Perfect dinner! Thank you!
Nikki Gladd says
Ooh! Great idea to make zeppole with the other half of dough! Thanks for the idea!
Shekelia S says
Thank you... I will now cook them weekly !!!!!
Nikki Gladd says
Yay!
Judy says
These breadsticks are better than...well...sliced bread . So easy to make and they were a big hit for my family. We snacked on them while making homemade pizza. What an excellent recipe!
Nikki Gladd says
Thank you, Judy! I didn't know anything could be better than sliced bread, but I guess this would be it! lol!
Tiger says
Thank you for sharing your recipe! In Europe, Pizza Hut doesn't serve breadsticks, and I miss them greatly. Yours are even better than I remember 🙂
Nikki Gladd says
I love hearing this! Thank you!
Maureen says
made these a few weeks ago and only used half the dough. They were SO GOOD! I froze the other half. I took it out of the freezer today to use tonight. Should I let it rise for an hour before shaping it in the baking pan? Or just put it in the baking pan and go? I did already let it rise once when I first made the full batch of dough.
Nikki Gladd says
Hi Maureen,
I realize by now you’ve already made the breadsticks and it’s too late for an answer. We’ve been traveling so I’m just now seeing your question. What did you end up doing? I would say as long as you let it rest on the counter from the fridge to get to room temp you should be good to go.
Holly says
I made this recipe as breadsticks and as pizza. This is the only pizza crust recipe I use right now because it is tasty. My only critique is that the dough needs more salt just a 1/2 teaspoon more and it’s perfect.
The breadsticks are really close to Pizza Hut breadsticks (I worked there in high school so ate a lot of them as a lunch or snack) just add cheese before cooking and you have cheese sticks.
We used the dough for pizza night last night with Whole Foods Pizza sauce (the same sauce they use on their hot pizzas) and it was so good. We had enough for two full sheets of pizza and leftovers for lunch today for me and three kids plus fruits and veggies and it was still tasty.
Awesome recipe. Simple and easy.
Nikki Gladd says
Thank you, Holly, for the great thorough review. I need to top with cheese soon and make the cheesy breadsticks! 🙂
Matt C says
Absolutely amazing. Thank you so much for the recipe! Ive made this several times now and the family gobbles them up. I used the seasoning on my homemade pizza crust and sprinkled on top as well. Delicious!!
Nikki Gladd says
Thank you for your review, Matt!
Ashley says
Curious if anyone has tried swapping the flour for gluten free flour. It’s been YEARS since I could have Pizza Hut breadsticks, I wonder if it would turn out the same.
Anonymous says
I’ve had great success with Cup4Cup or Great Value GF flour in almost any recipe. Usually it’s an equal swap, but occasionally I need a bit more GF flour than the original recipe requires.
Good luck!
Nikki Gladd says
Thanks for chiming in with your helpful tips!
Chie says
Hello. I’m excited to make my own breadsticks and pizza. I just wanted to clarify a couple things. I know that bread dough usually requires 2 rises, first one right after kneading and the second one after shaping the dough. I don’t see that your recipe requires the first rise after kneading...? I can just skip the process and spread the dough into the pan? If I also make a pizza with the other half of dough should I let it rise before I roll out onto the pizza pan? Thanks
Nikki Gladd says
Hi Chie! You read it right. 🙂 This recipe only requires the one rise. If you want to use the other half for a pizza, you can choose to let it rise first for 30 to 45 minutes, but you do not have to. I've done both -- depending on how much of a rush I'm in to make my pizza. haha! (Although the results will be best with a rise.)
Chie says
Perfect! Thanks for the quick response
Wendy says
These look wonderful and I am making them tonight with our dinner. If I choose to make only one 9x13 pan can the remaining dough be refrigerated or frozen? And if so, do you refrigerate/freeze after the 1 hour rise?
Nikki Gladd says
Hi Wendy! Yes, I would refrigerate it after the 1 hour rise, then when you're ready to use it take it out 30 minutes before hand to let it rest and come back to room temperature. I also use half the dough sometimes for one pan of breadsticks and the other for making a homemade pizza. Hope this helps! 🙂
Wendy says
Yes, thank you. Pulling ingredients together now
Wendy says
These were fantastic!! The parmesan topping is spot on. I saved the other half of the dough in the fridge and made pizza later in the week.
Nikki Gladd says
Thank you, Wendy! So glad you enjoyed them and cannot wait to hear how the other half turns out!
Rachel Pargeter says
These are fantastic, better than Pizza Hut, definitely!!! I only have one metal 9 x 13 pan, just ordered another one just for this recipe as I used one glass pan and one metal and preferred the results in the metal pan, which came out golden and toasted on the bottom and sides. The ones in the glass pan were a little pale, but I toasted them for a couple of minutes in my toaster oven and they were great! I am allergic to onions so just omitted the onion powder from the seasoning and now can I can make my own bread sticks and not have an allergic reaction. Thanks so much for sharing this recipe!
Nikki Gladd says
Thank you for your feedback, Rachel! I love that you ordered a new pan JUST for these. 🙂
Anonymous says
These are delicious...the way the Pizza Hut breadsticks used to taste when I was a kid!!! I just made them yesterday, and I am making them again today because the whole family was fighting for the last one! I am using the same dough recipe to make a pizza in my cast iron skillet to go along with them. Thanks for an awesome recipe!!!
Nikki Gladd says
Thank you for the kind review! I'm so glad you and your family loved them. Hope you enjoy your cast iron pizza, too! 🙂
Sue Knapp says
Can’t wait to make these, better yet, can’t wait to eat them!s
Nikki Gladd says
You'll love eating them, like I do! 🙂
Krystal says
This was excellent! I made a mistake and used 4tbsps less better in the bottom and it still turned out amazing. Next time though I won't sprinkle all the topping on. It was a bit too thick. Can't wait to try this recipe for pizza!